“I really like the step-by-step approach”

Start Learning Now!
-
Start with this free tutorial in the Python course
-
Learn the easy way in step-by-step stages
-
Getting stuck? Follow an in-depth video
-
Share on your community forum
Overview of this Python Tutorial
Estimated Time – 1 Hour
- Hello Python
- Python is powerful, expressive programming language
- Object-oriented
- Dynamic typing
- Interpreted
- Available on a wide range of platforms
- Unix/Linux
- Windows
- Mac OS X
- etc.
- Python is powerful, expressive programming language
- What can you do with Python?
- Scripting
- File I/O
- XML processing
- String handing and regular expressions
- Web applications, using Django
- Web services
- Many people use Python as a better scripting language. It’s a lot more powerful (and easier to use) than Unix shell scripts and/or Windows batch files. Python is a “real” programming language, and offers much better language features than scripts and batch files.
- Python is highly modular – you can split your program into modules, and then reuse the modules in other Python programs. Python has a lot of standard modules for performing common tasks such as file I/O, XML processing, sockets and networking, etc.
There are also modules available that allow you to implement web applications and web services, so it’s a very powerful platform indeed.
- About Python Django
- Django is a popular web framework
- Object-relational mapper
- Automatic administrative interface
- Customizable URL routing
- Many popular web sites use Django. For a full list, see https://www.djangosites.org/.
- Widely used by major web sites, including:
- Mozilla
- Lego it
- etc.
- Django is a popular web framework
Tutorial 2: Downloading and installing Python
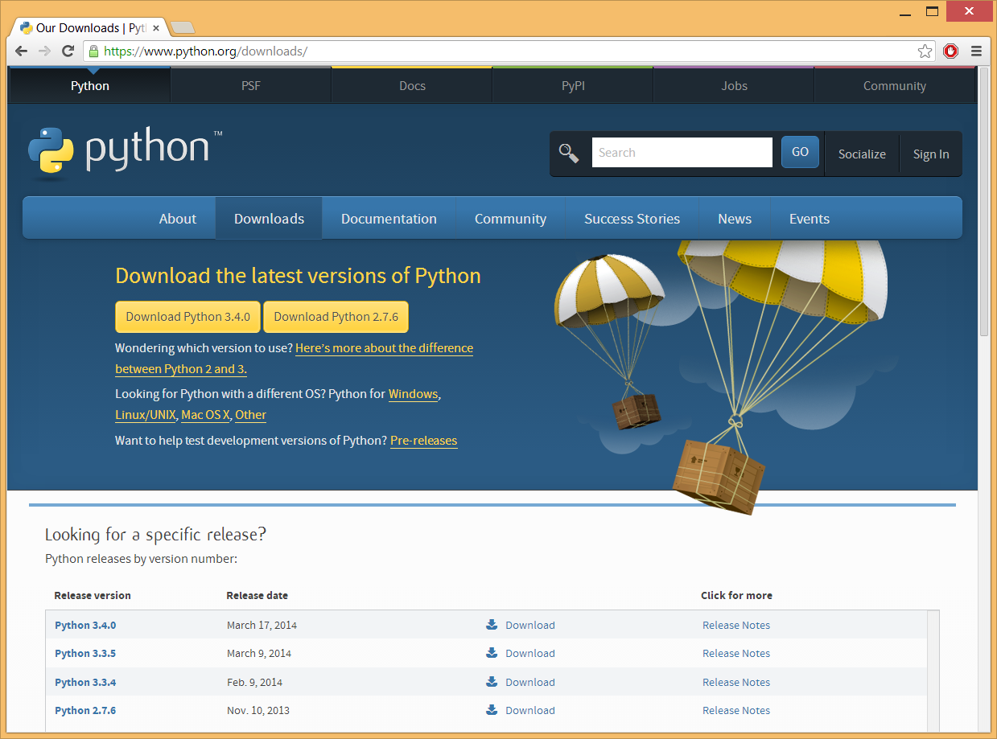
- Downloading Python
- You can download Python for free – https://www.python.org/downloads/
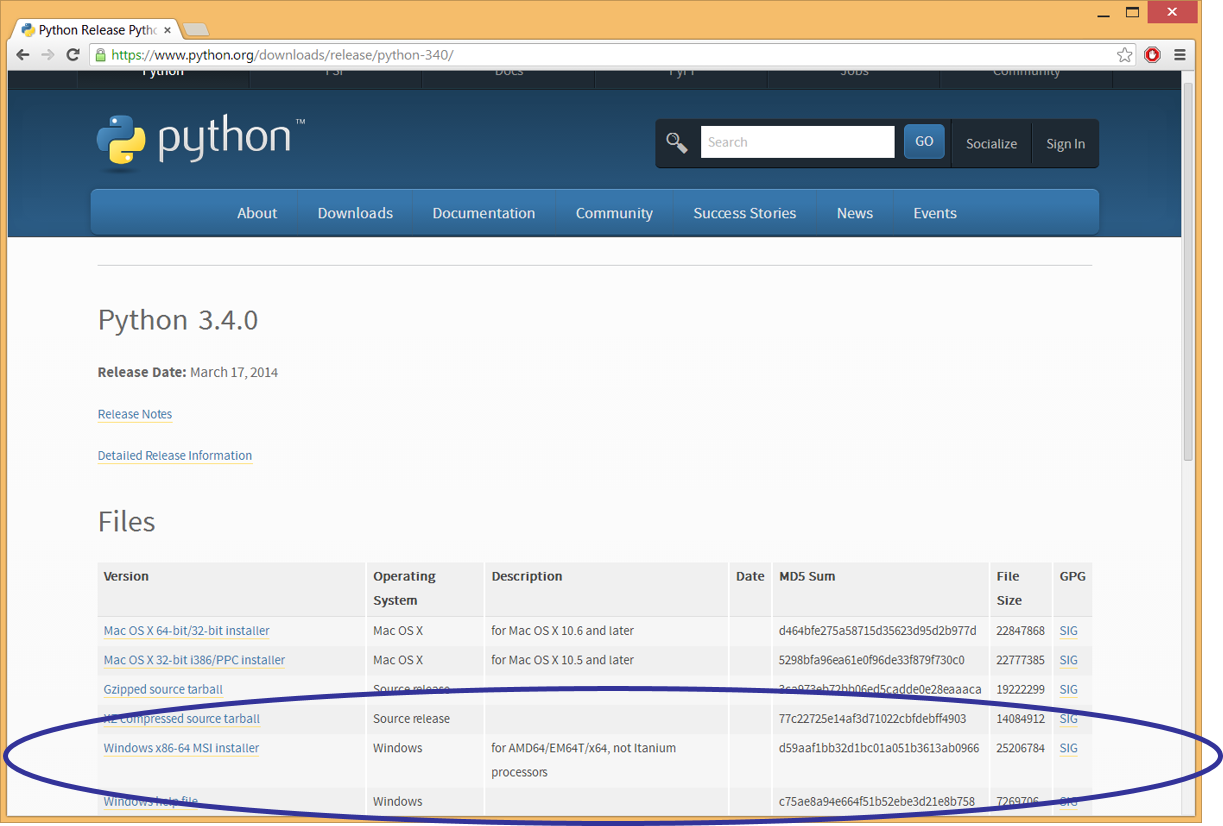
- Here’s the download page for Python 3.4 – This screenshot shows what we installed on the machines in the classroom, i.e. Python 3.4 for Windows x86-64 MSI installer.
This is a regular Window MSI installer. When the download is complete, simply run the .msi file to install Python.
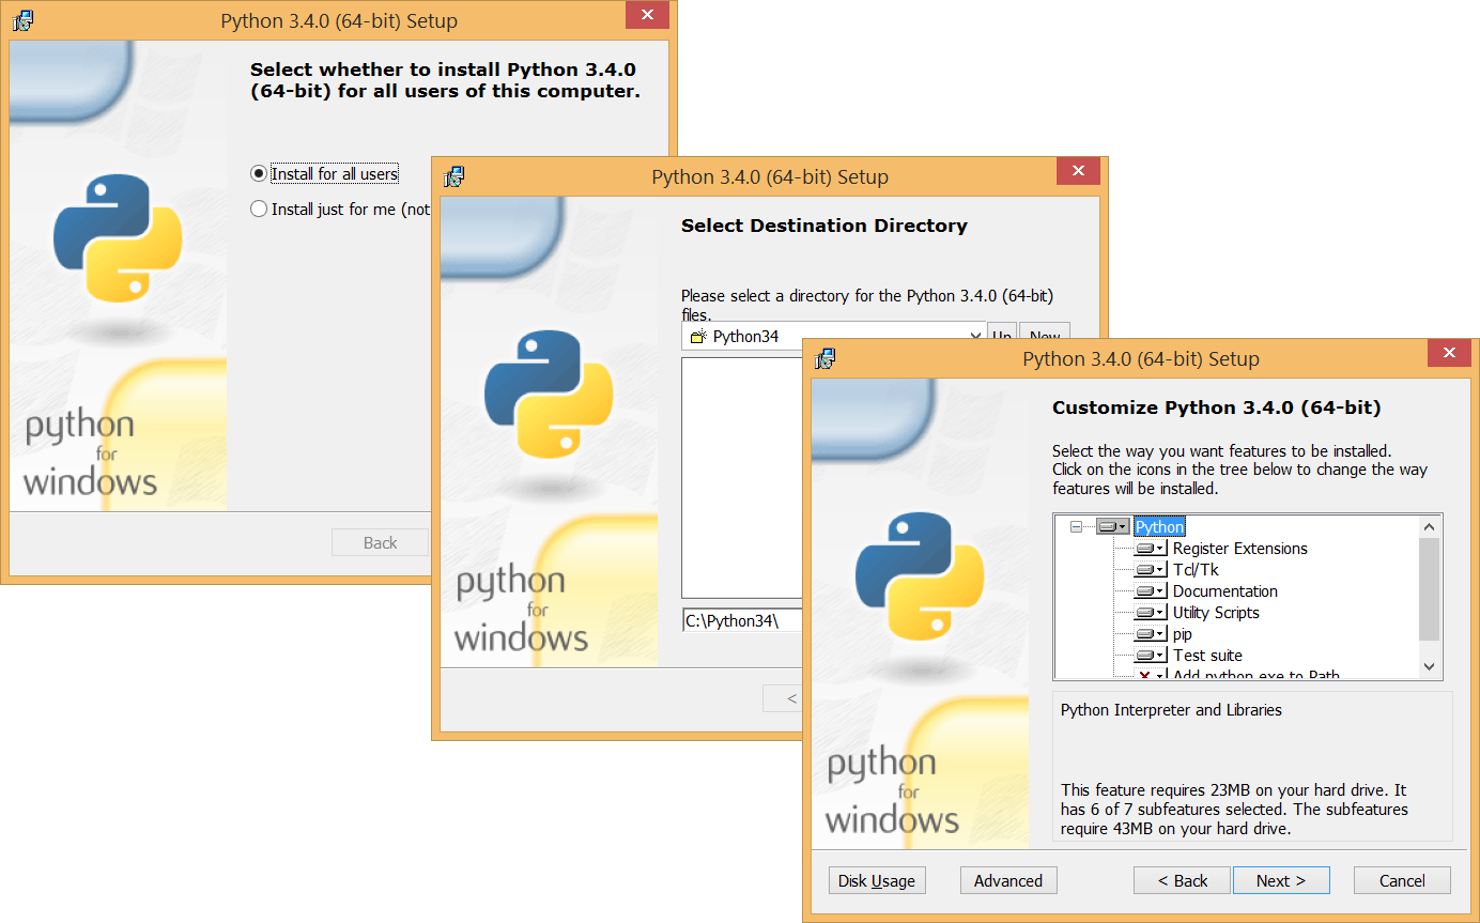
- Installing Python
- The default installation folder for Python 3.4 in Windows is C:\Python34\. If you are installing Python on Linux/Unix, the default location is usually /usr/local/bin/python3.4.
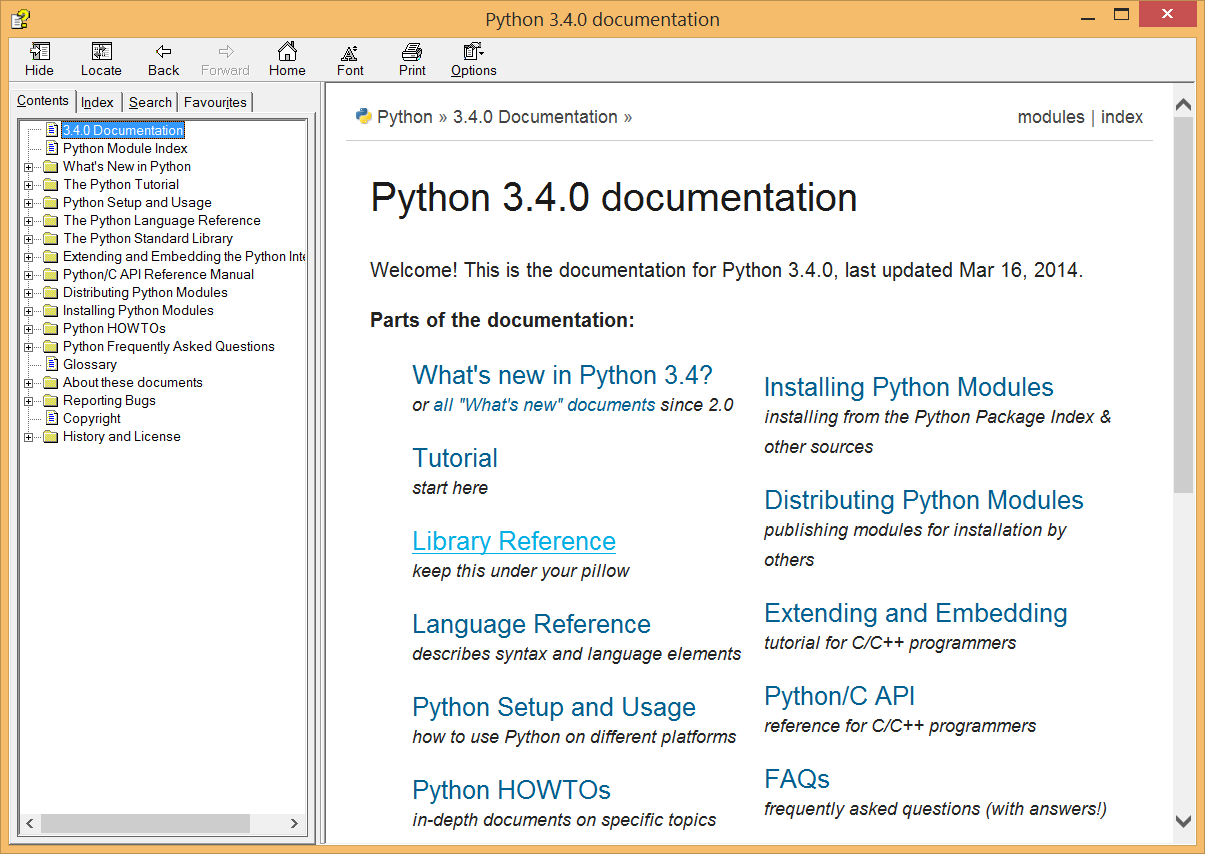
- Using Python Documentation – The supplied documentation is pretty good actually, certainly as a starting point if you’re new to Python. In Windows, he documentation file is located in the C:\Python34\Doc folder, and the filename is python340.chm.
- Python Versions
- Major differences between Python 3.x and Python 2.x
- If you’ve come from Java or C++, where languages tend to evolve in a consistent and non-breaking kind of way, you’ll probably be surprised (and alarmed) to learn that there are significant inconsistencies between different versions of Python.
- In practice, this means Python 2.x code won’t work on a Python 3.x platform – you’ll get a lot of syntax errors.
For more information about the differences between Python 3.x and Python 2.x, see https://docs.python.org/3/whatsnew/3.0.html.
Tutorial 3: Running Python script code
- Running Python Script Interactively
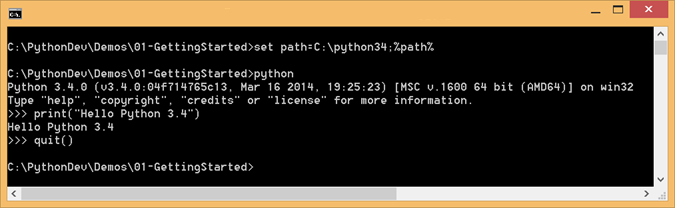
- Python is an interpreted language. You can run Python script code directly through the Python interpreter, as shown in the picture.
You need to ensure Python is on the path. To do this in Windows, type the following command in the command window: set path=C:\python34;%path%

- When you run the Python interpreter as shown in the slide, it runs in interactive mode. In this mode, it prompts you for the next command with the primary prompt, i.e. >>>. This allows you to execute statements line-by-line, such as the print() function as shown in the example below

- To exit interactive mode, call the quit() function or type an end-of-file character (Ctrl+Z in Windows, Ctrl+D in Unix/Linux). See the full example below:
- Python is an interpreted language. You can run Python script code directly through the Python interpreter, as shown in the picture.
- Creating Variables
- In Python, you don’t need to declare a variable
- Just assign it a value, and Python will create it for you dynamically
- The Python interpreter uses dynamic typing, i.e. variables are assigned values at run time, and it’s only then that the Python interpreter knows what the data type is.
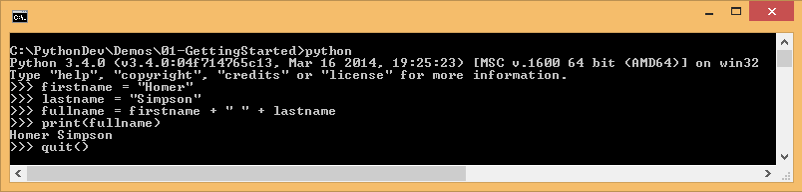
- Example
- First. we create a variable named firstname and assign it the value “Homer”.
- Next, we create a variable named lastname and assign it the value “Simpson”.
- Then we create a variable named fullname and assign it the full name, “Homer Simpson”.
- Finally we call print(), a standard Python function to print a message on the console.
- Rules for identifiers in Python
- Can contain uppercase or lowercase letters, digits, and underscore
- But can’t start with a digit
- In Python, you don’t need to declare a variable
- Line Continuation
- If a statement spans multiple lines…
- You can use \ to continue from one line to the next
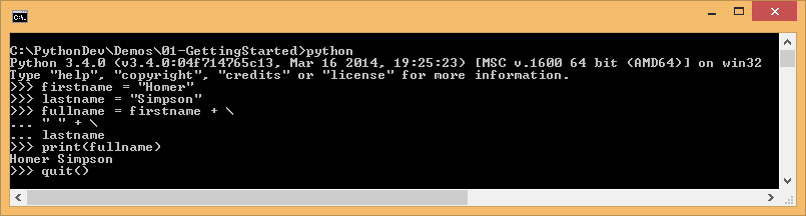
- Example
- The backslash character \ is the line continuation character in Python.
- Note that expressions in parentheses, square brackets, or curly braces can be split over more than one physical line without using backslashes.
- The example shows how to use the \ character – see the statement where we build up the fullname variable.
- If a statement spans multiple lines…
- Blocks
- Blocks are important in any programming language. For example, they enable you to create multi-statement bodies for if-tests, while-loops, etc.
- Unlike most programming languages, Python doesn’t use anything like braces {} to denote the start and end of a block. Instead, Python relies on indentation. To indicate which statements are inside a block, you simply indent the statements by the same amount of spaces.
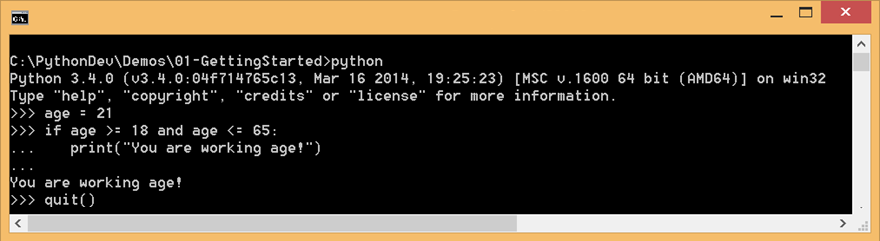
- Example
- First, we create a variable named age and assign it the value 21
- Then we have an if statement to test if age is between 18 and 65 inclusive. Note there’s no need for parentheses around the test. Also note the :, which are optional. The : indicates the start of an indented block. The code would work even if you omitted the : here.
- Next we call print(), to print the person’s age. Note that this statement is indented, which is significant.
- After the print() function is an empty line. There’s no indentation here, which indicates the end of the if statement block, so the Python interpreter executes the code and outputs the message.
- Creating and Running Python Modules
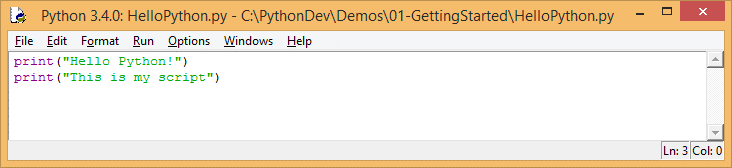
- Whilst it’s handy to be able to execute Python code interactively at the Python prompt, you’ll probably spend most of your time writing Python code in script files
- Python uses the term “module” to mean a script file. Modules are usually lowercase, and have the .py or .pyc file extension. The code shows an example called greeting.py
- A module is just a script file containing Python code
- Typically starts with a lowercase letter, and ends in .py
print("Hello Python!")

print("This is my module")
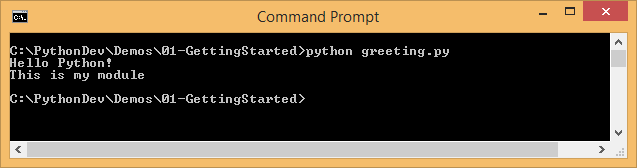
- To run a Python script file via the interpreter, simply run Python and give it the name of your module as shown below. The Python interpreter fires up, executes your module, and then terminates.
python greeting.py
- Note: On Windows systems, the Python installer automatically associates .py files with the Python interpreter. So you can just double-click on a .py file, and it will automatically be executed as a Python module.
- Aside: Python Keywords
- When you start using a language, it’s always a good idea to know what keywords are predefined in the rules of the language.
- Here is a full list of all the keywords in Python 3.4
- False, None, True
- if, elif, else, assert, is
- and, or, not
- for, in, from, while, break, continue, pass
- def, return, global, nonlocal, lambda
- import, from
- class, del
- raise, try, except, as, finally
- with, as
- yield
- You can actually ask Python for a list of all the keywords it recognizes, as shown in the script snippet. Note the following points:
- Python organizes its libraries into modules. There’s a standard Python module named keyword. This is actually a Python script file named keyword.py, located in the Lib folder.
- The keyword module has a kwlist variable, which returns a list of all the keywords recognized by the Python interpreter. This is the result we get back in Python 3.4:
import keyword

keyword.kwlist
- Customizing Python
- You can customize the way Python works by providing customization scripts, either per-user or per-site.
- You have to put these scripts into the user-site-packages folder and the site-packages folders respectively.
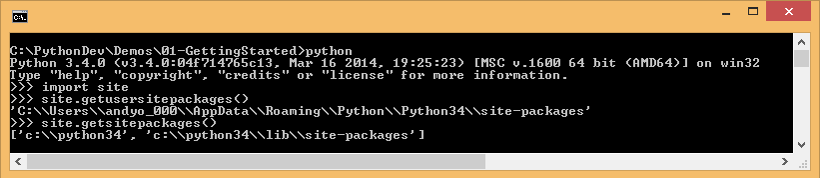
- To find out where these folders are, start Python and run the following code:
import site

site.getusersitepackages()

site.getsitepackages()
- In this code, the first statement imports the site module. This is a standard Python module, and it defines many functions such as getusersitepackages() and getsitepackages().
- Once you know which folders to use, you can put customization scripts in those folders. For example, to create a per-user customization script, create a module file named usercustomize.py or sitecustomize.py and put it in the appropriate folder. This script will be executed automatically when Python is fired up.
- You can customize the way Python works by providing customization scripts, either per-user or per-site.
- Porting Python 2 Code to Python 3
- Consider the following Python 2 code called greeting2.py
- Causes errors if you run it via a Python 3 interpreter
print "Hello Python!"

print "This is my Python 2.x code"
- Causes errors if you run it via a Python 3 interpreter
- You can convert Python 2 code to Python 3 syntax
- Use 2to3.py, located in Tools/Scripts folder
- Specify the -w command-line option
C:\Python34\Tools\Scripts\2to3 -w greeting2.py
- If you specify the -w command-line option, it overwrites the existing file with the new syntax (it also creates a backup of the original file).
- Consider the following Python 2 code called greeting2.py
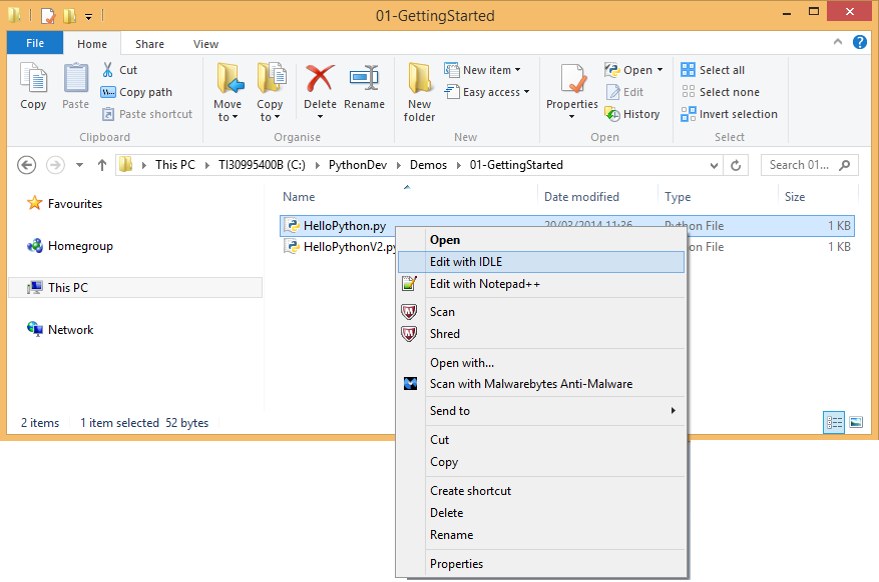
- Using IDLE
- IDLE is a free IDE for Python, included as part of Python for Windows. To open a Python file in IDLE, right-click the file and select Edit with IDLE from the popup menu.
- Note: Lots of other IDEs are available, including:
- PyDev for Eclipse (see https://pydev.org)
- Komodo Edit (see https://komodoide.com)
- Notepad++ (see https://notepad-plus-plus.org)
- IronPython for Visual Studio (see https://ironpython.codeplex.com)
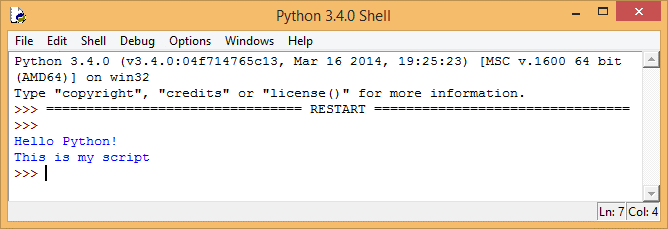
- IDLE gives you colour coding, IntelliSense, etc.
- You can execute the script in a shell, via F5
Lab
- Exercise 1: Writing Python script interactively
- Open a command window and go to the student folder for this lab. Try to start Python; if it’s not on the system path, add it to the path as follows (in Windows):
set path=C:\python34;%path%
- In the Python interpreter, create variables to hold some data, e.g. your name and age (hard-coded for now). For example:
name = "John Smith"

age = 21
- Print these variables on separate lines, using the standard print() function (note the parentheses are required in Python 3.x, to call the print() function):
print(name)

print(21)
- Now try printing these variables in a single string, such as the following:
print(name)

print(21)
- You’ll get a Type Error from the interpreter now, saying it can’t convert the int to a str implicitly. This tells us two things: Python has an int data type, and Python doesn’t automatically convert the int to a string. To rectify the problem, use the standard str() function as follows:
print(name + "is " + str(age) + " years old")
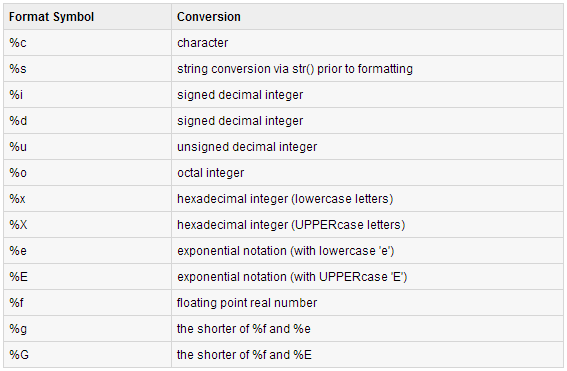
- Now try the following code. The print() function allows you to specify a format string, containing format specifiers such as %s for string, %d for decimal integer, etc. After the format string, the % (name,age) syntax passes all the values required to fill in the blanks. We’ll describe this syntax in more detail later:
print("%s is %d years old" % (name, age))
- Here’s a full list of format specifiers you can use in the print() function. Try these out, to see what effect you get:
- You can also use escape sequences such as the following, try these out too:
- \a audible alert
- \b backspace
- \n newline
- \r carriage return
- \s space
- \t tab
- \v vertical tab
- Open a command window and go to the student folder for this lab. Try to start Python; if it’s not on the system path, add it to the path as follows (in Windows):
- Exercise 2: Writing Python modules
- Start the IDLE editor. You can run this from the Windows start screen, or manually from a folder such as the following:
C:\ProgramData\Microsoft\Windows\Start Menu\Programs\Python 3.4\
- Create a new file and save it as userinfo.py. Add code to perform the following tasks:
- Ask the user to enter their name and age
- Calculate the user’s age next birthday
- Output these details
- Here are some hints:
- To get input from the standard input device (i.e. the keyboard), use the input() function. The input() function takes a string parameter that displays a prompt message to the user. The function always returns a string:
# Get the user's name and age, from stdin.

name = input("Enter your name: ")

ageStr = input("Enter your age: ")
- When you get the user’s age, it’ll come back into your program as a string. You’ll need to convert it into an int, so you can do maths on it. To do this, call the int() function:
# Convert the age from a string to an int.

age = int(ageStr)

# Calculate the user's age next birthday.

age += 1
- Add some comments to your code, to describe the salient points. Comments start with # in Python as seen above
- Output the message and run your module using F5
# Output a simple message.

print("%s, you will be %d next birthday" % (name, age))
- To get input from the standard input device (i.e. the keyboard), use the input() function. The input() function takes a string parameter that displays a prompt message to the user. The function always returns a string:
- Start the IDLE editor. You can run this from the Windows start screen, or manually from a folder such as the following:
If you would like to see more content like this in the future, please fill-in our quick survey.