“I registered to enhance my employability”

Start Learning Now!
-
Start with this free tutorial in the Java course
-
Learn the easy way in step-by-step stages
-
Getting stuck? Follow an in-depth video
-
Share on your community forum
Exam Preparation
The Java course will help you prepare for these certifications:
-
Oracle Certified Java Associate – Exam 1Z0-803
-
Oracle Certified Java Professional – Exam 1Z0-804
Overview of this Java Tutorial
Estimated Time – 0.5 Hours
- Hello Java
- Java is one of the most widely-used object-oriented languages in contemporary software development
- Other popular OO languages include C#, C++, etc.
- OO principles:
- Java is one of the most widely-used object-oriented languages in contemporary software development
- Java Timeline
- Java first appeared in 1996
- Java Development Kit (JDK) 1.0
- Contained 6 packages
- Original goal was to create platform-agnostic apps for mobile devices
- In practice, many organizations used Java to create applets
- Sun reorganized their Java products in 1999
- Java 2 Standard Edition (J2SE)
- Java 2 Enterprise Edition (J2EE)
- Java 2 Micro Edition (J2ME)
- There have been many subsequent upgrades to the language and libraries!
- Java first appeared in 1996
- Java vs. Other Languages
- Java vs. C++
- Java syntax is very similar to C++ (not coincidental)
- Java compiles to platform-neutral byte codes that run on a Java Virtual Machine (JVM), whereas C++ compiles to platform-specific machine instructions
- Java handles memory management via garbage collection, whereas C++ makes you manage memory yourself
- Java has an extensive and rich class library, whereas the C++ standard class library is much more limited (until C++11 recently)
- Java doesn’t run as quickly (or as leanly) as C++
- Java vs. C#
- Java syntax is very similar to C# (again, this is no coincidence!)
- In fact, Java and C# are quite comparable in many aspects:
- Java vs. C++
- What can you do with Java SE?
- You can use Java SE to:
- Create standalone Java applications
- Create Windows-based applications
- Manipulate text files, binary files, and XML data
- Access databases, via Java Database Connectivity (JDBC)
- Create multithreaded applications
- Create client-server applications, using Remote Method Invocation (RMI)
- Etc…
- You can use Java SE to:
- What can you do with Java EE?
- Going further, you can use Java EE to create:
- Web applications, using servlets, JavaServer Pages (JSPs), and Java Server Faces (JSF)
- Web services
- Middle-tier session beans, using Enterprise JavaBeans (EJBs)
- Data-access entity beans, using the Java Persistence API (JPA)
- Message-queueing applications, using the Java Message Service (JMS)
- Etc…
- Going further, you can use Java EE to create:
- Downloading Java SE
- Download Java SE (details vary depending on version) :
- https://www.oracle.com/technetwork/java/javase/downloads/index.html

- Download Java SE (details vary depending on version) :
- Installing Java SE
- Select and run the appropriate JDK installation
- E.g. jdk-7u51-windows-x64.exe
- Accept all defaults during installation
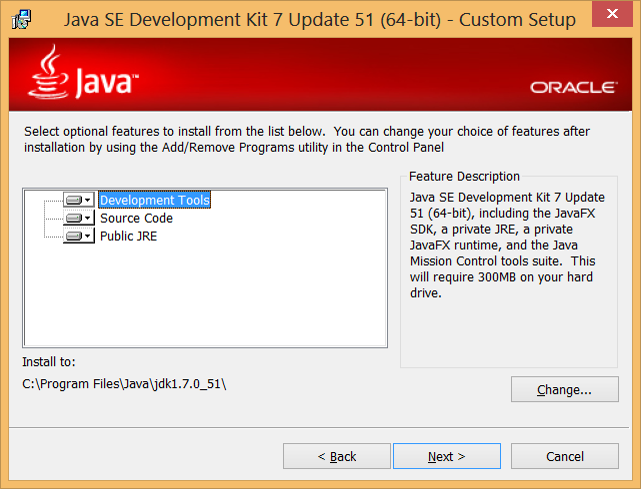
- Select and run the appropriate JDK installation
- Java SE Folder Structure
- Default installation folder for Java SE (v1.7, update xx):
- C:\Program Files\Java\jdk1.7.0_xx
- Folder structure:
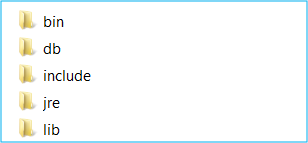
- Default installation folder for Java SE (v1.7, update xx):
- Minimalistic Development
- Define a public Java class
- Filename must be classname.java
public class MyFirstApp {

 public static void main(String[] args) {

  System.out.println("Hello world");

 }

}
- Filename must be classname.java
- Compile the class from the command line
- Using the Java compiler, javac.exe
- Note, javac.exe must be on the path
- Below will create MyFirstApp.class
javac MyFirstApp.java
- Define a public Java class
- Run the class from the command line
- Via the JVM, java.exe
- Note, java.exe must be on the path
- You specify the classname without the .class extension
java MyFirstApp

Hello world

JAR files
- Overview of JAR Files
- In a real Java application, you’ll have lots of Java classes
- Each class is compiled to a separate .class file
- It’s common to bundle up all the classes etc… into a JAR file
- Typically use the .jar file extension
- The Java Archive (JAR) file format is a zip-file really
- You can manage JAR files by using the jar.exe tool from the command line
- Part of the JDK
- In a real Java application, you’ll have lots of Java classes
- How to Create a JAR File
- To create a JAR file:
jar cfm jar-file-name manifest-file-name input-file(s)
- Here’s a description of the options:
- c means you want to create a JAR file
- f means you want the output to go to a file (rather than STDOUT)
- m means you want to include a manifest file (see later)
- And here’s a description of the file names:
- jar-file-name is the name of the JAR file you want to create
- manifest-file-name is the name of the manifest file (see later)
- input-file(s) is a list of files to include in the JAR file
- To create a JAR file:
- Example: Java Files
- Let’s see how to create a JAR file containing 2 Java classes
- See the DemoGettingStarted folder
- Here’s the “main” Java class for the application:
public class MyProg {

 public static void main(String[] args) {

  System.out.println("Hello from my program.");

  MyHelper.displayDateTime();

  System.out.println("Goodbye from my program.");

 }

}
- View code file.
- And here’s a “helper” Java class for the application:
public class MyHelper {

 public static void displayDateTime() {

  System.out.println("It is now " + new java.util.Date());

 }

}
- View code file.
- Let’s see how to create a JAR file containing 2 Java classes
- Example: Specifying the Entry Point
- If you have an application bundled in a JAR file, you need some way to indicate which class file is the entry point
- You provide this information in a “manifest file”
- Set the Main-Class property to the name of the main class
Main-Class: MyProg
- Notes:
- You must specify the fully-qualified name of the class (including its package name – see later for more info about packages)
- The manifest file must end in a new line or carriage return
- If you have an application bundled in a JAR file, you need some way to indicate which class file is the entry point
- Example: Creating the JAR File
- First, compile the Java classes:
javac MyProg.java MyHelper.java
- Then create a JAR file containing the .class files and the manifest file:
jar cfm MyFirstJarFile.jar manifest.txt MyProg.class MyHelper.class
- First, compile the Java classes:
- How to Run a JAR’d Application
- To run a JAR’d application:
- Run java.exe to launch the Java Virtual Machine
- Use the -jar option to indicate you want to run a JAR file
- The JVM consults the manifest file to determine the main class
java -jar MyFirstJarFile.jar

Hello from my program.

It is now Mon Feb 17 10:54:07 2014

Goodbye from my program.
- To run a JAR’d application:
Using an IDE
- What Java IDE‘s are out there?
- Popular Java IDEs:
- Eclipse (we’ll be using this)
- Oracle JDeveloper
- IBM WebSphere Application Developer
- NetBeans
- Etc…
- Popular Java IDEs:
- Downloading and Installing Eclipse
- In a browser window:
- Browse to https://www.eclipse.org/downloads
- Click the Eclipse IDE for Java Developers product
- In the next Web page:
- Click the appropriate download link for your platform, e.g. Windows 64-bit
- The download is a simple zip file
- Unzip the Eclipse zip file
- To the C:\ destination folder
- Creates a folder named C:\eclipse
- In a browser window:
- Starting Eclipse
- Start Eclipse
- i.e. run c:\eclipse\eclipse.exe
- Eclipse prompts you for a workspace
- The workspace is a folder that will contain all your Java projects
- Specify C:\JavaWorkspace
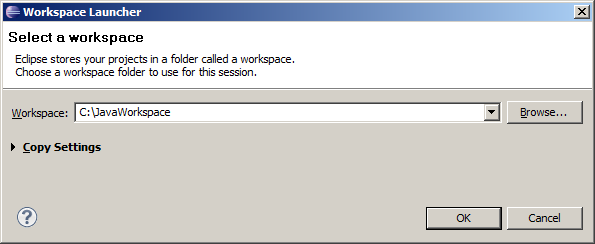
- Start Eclipse
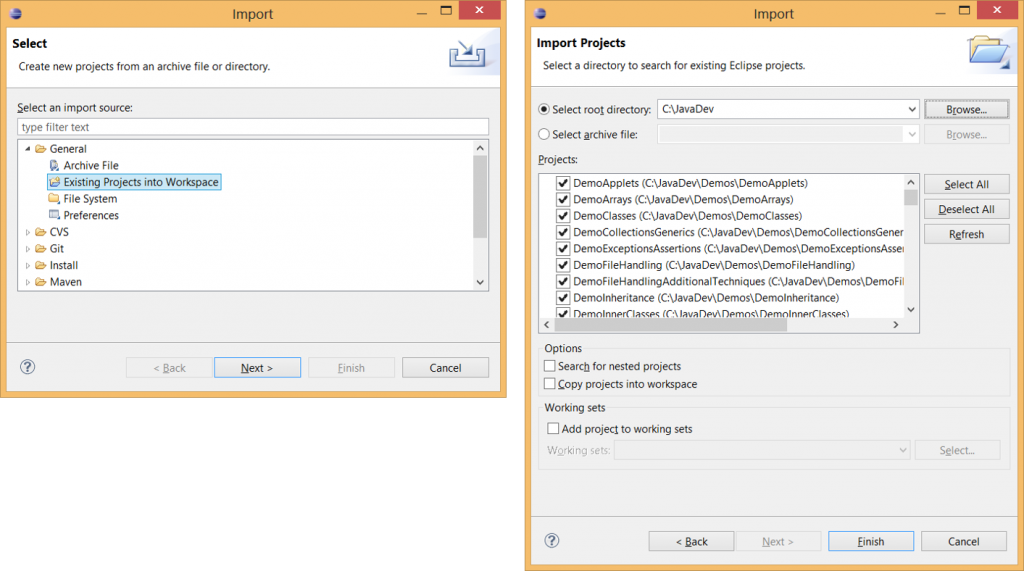
- Loading Existing Projects
- You can load existing projects into the workspace
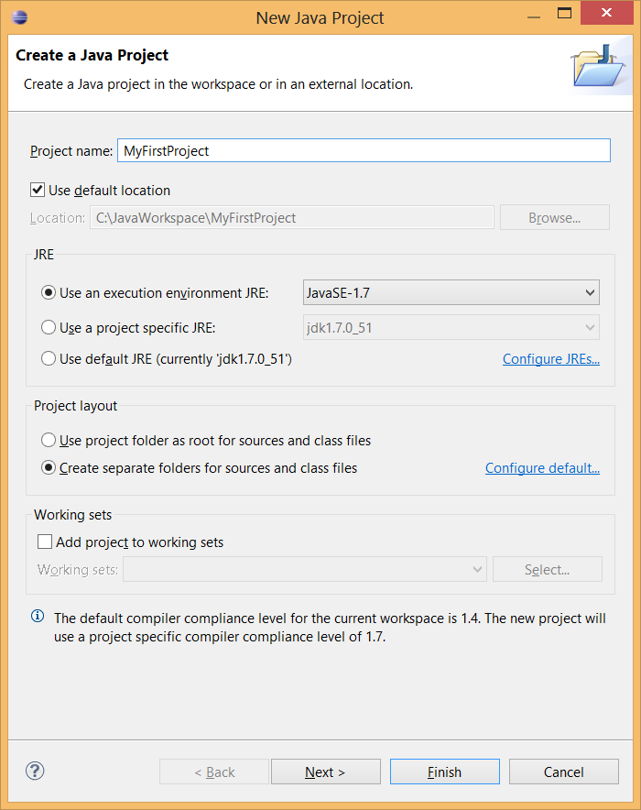
- Creating a Java Project
- You can create a new Java project
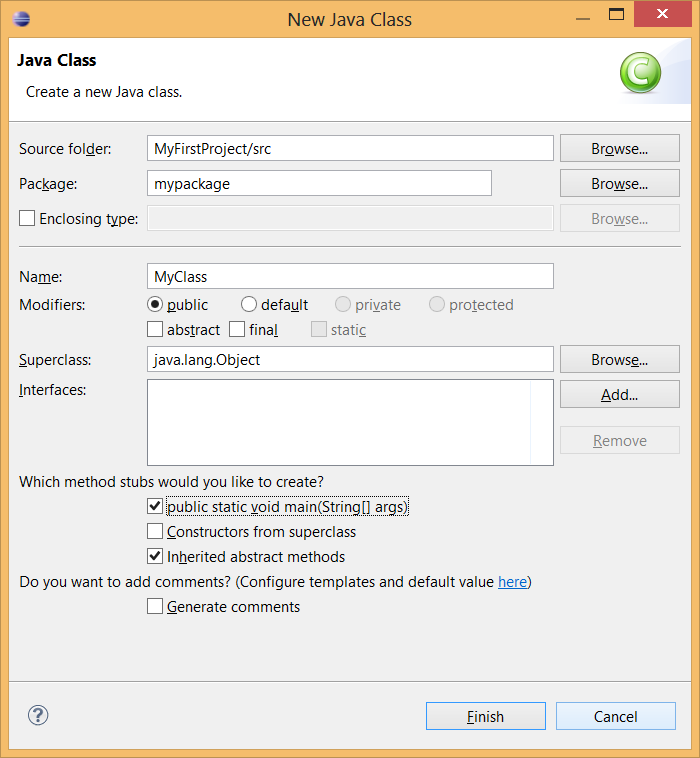
- Adding a Class
- You can add a new class to your project
- Implementing the Class
- Implement the class, e.g:
package mypackage;

public class MyClass {


 public static void main(String[] args) {

  System.out.println("Eclipse says Hello!");

 }

}
- View code file.
- Implement the class, e.g:
- Running the Class
- Run the class and see the output in the console window


If you would like to see more content like this in the future, please fill-in our quick survey.