About this Tutorial –
Objectives –
These exercises use Visual Studio to create HTML pages using Cascading Style Sheets or CSS. The exercises can also be done in other HTML editors. Just paste the code snippets in to the editor then view the page in a browser.
CSS is widely used to give websites a consistent and pleasing look. The format of text and images on the website can easily be adjusted using style sheets. The style of the whole website can be changed by editing a single style sheet. This is much more effective than changing all the individual HTML elements in the website.
The exercises use CSS 2.1. But they focus on common CSS syntax and can easily be adapted to other versions of CSS.
Audience
This course has been designed primarily for programmers new to the .Net development platform. Delegates experience solely in Windows application development or earlier versions of ASP.Net Development will also find the content beneficial.
Prerequisites
Before attending this workshop, students must:
- Be able to manage a solution environment using the Visual Studio 2012 IDE and tools
- Be able to program an application using ASP.Net
Contents
Copyright 20/12/12 – David Ringsell
Quick Access
Exercise 1 Style Text
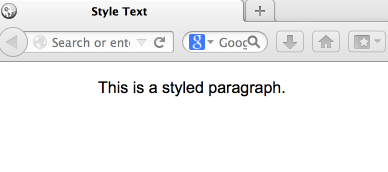
We’ll start by just setting a style definition for the paragraph element. This means we style all text contained in <p> tags. To do this a script block is added to the page. In this block, the attributes of the <p> tag are adjusted.
- In Visual Studio, use the File>New Project menu, to create a C# ASP.Net Empty Web Application Project.
- Add a new HTML page to the project. Do this by right-clicking the project name in Solution Explorer and using the context menu. Select Add>New Item … from the context menu. Set this HTML page as the start page, by again using the context menu.
- Replace the content of the page with the CSS and HTML below.
- Test the project by building and executing it. Does the formatted page appear in a browser?
- Stop the application by selecting the Debug>Stop Debugging menu.
<!DOCTYPE html>
<html xmlns=”http://www.w3.org/1999/xhtml”>
<head>
<title>Style Text</title>
<style type=”text/css”>
/*Style definitions for the paragraph element*/
p
{
text-align: center;
color: black;
font-family: arial;
}
</style>
</head>
<body>
<p>This is a styled paragraph.</p>
</body>
</html> - View code
Exercise 2 Style Multiple Elements
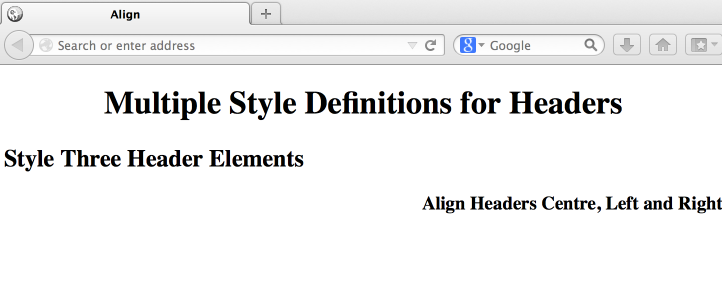
Next we’ll set styles for three header elements; <h1>, <h2> and <h3>. It makes sense to style several elements on the page in a single style block. Each header element will have a different text alignment.
- Add a new HTML page called Align.html to the project you created in Exercise 1. Do this by right-clicking the project name in Solution Explorer and using the context menu. Set this HTML page as the start page by again using the context menu.
- Replace the content of Align.html with the HTML and CSS tags and text below.
- Test the project by building and executing it. Does the formatted page appear in a browser?
<!DOCTYPE html>
<html xmlns=”http://www.w3.org/1999/xhtml”>
<head>
<title>Align</title>
<style type=”text/css”>
/*Styles are set for 3 header elements*/
h1 {text-align: center}
h2 {text-align: left}
h3 {text-align: right}
</style></head>
<body>
<h1>Multiple Style Definitions for Headers</h1>
<h2>Style Three Header Elements</h2>
<h3>Align Headers Centre, Left and Right</h3>
</body>
</html> - View code
Exercise 3 Set Colour of Text
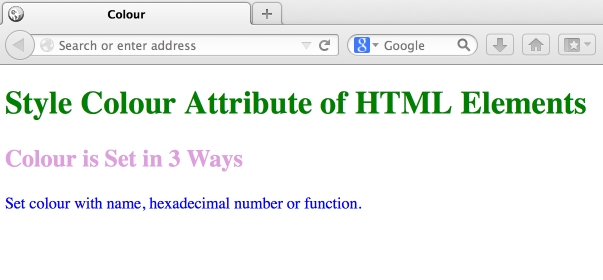
We can easily style the colour of page elements. CSS provides three ways to describe a colour. The colour will be set using a name, a hexadecimal number and a function.
- Add a new HTML page to the project you created in Exercise 1. Do this by right-clicking the project name in Solution Explorer and using the context menu. Set this HTML page as the start page by again using the context menu.
- Replace the content of the page with the HTML and CSS tags and text below
- Test the project by building and executing it. Does the formatted page appear in a browser?
<!DOCTYPE html>
<html xmlns=”http://www.w3.org/1999/xhtml”>
<head>
<title>Colour</title>
<style type=”text/css”>
/*Colour can be set in 3 ways*/
h1 {color: green}
h2 {color: #dda0dd}
p {color: rgb(0,0,255)}
</style>
</head>
<body>
<h1>Style Colour Attribute of HTML Elements</h1>
<h2>Colour is Set in 3 Ways</h2>
<p>Set colour with name, hexadecimal number or function.</p>
</body>
</html> - View code
Exercise 4 Style Grouping
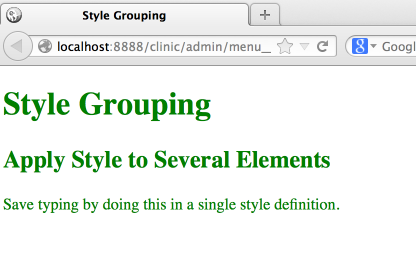
We will apply a style to a group of elements in a single definition. This gives the page a consistent look. Three elements will be styled to green.
- Add a new HTML page to the project you created in Exercise 1. Do this by right-clicking the project name in Solution Explorer and using the context menu. Set this HTML page as the start page by again using the context menu.
- Replace the content of the page with the HTML and CSS tags and text below
- Test the project by building and executing it. Does the formatted page appear in a browser?
<!DOCTYPE html>
<html xmlns=”http://www.w3.org/1999/xhtml”>
<head>
<title>Style Grouping</title>
<style type=”text/css”>
/*A style can be applied to several elements*/
h1, h2, p
{
color: green;
}
</style></head>
<body>
<h1>Style Grouping</h1>
<h2>Apply Style to Several Elements</h2>
<p>Save typing by doing this in a single style definition.</p>
</body>
</html> - View code
Exercise 5 Use the Class Selector
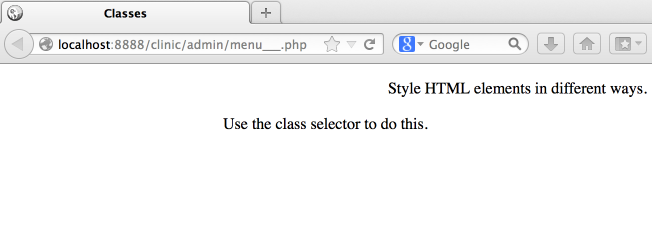
The same element can be styled in different ways using the class selector. This adds a lot of flexibility to CSS. A <p> tag will be styled with right and center text alignment. Both styles will then applied to the page.
- Add a new HTML page to the project you created in Exercise 1. Do this by right-clicking the project name in Solution Explorer and using the context menu. Set this HTML page as the start page by again using the context menu.
- Replace the content of the page with the HTML and CSS tags and text below
- Test the project by building and executing it. Does the formatted page appear in a browser?
<!DOCTYPE html>
<html xmlns=”http://www.w3.org/1999/xhtml”>
<head>
<title>Classes</title>
<style type=”text/css”>
/*The class selector allows different
styles for the same HTML element*/
p.right {text-align: right}
p.center {text-align: center}
</style></head>
<body>
<p class=”right”> Style HTML elements in different ways.</p>
<p class=”center”> Use the class selector to do this. </p>
</body>
</html> - View code
Exercise 6 Use an External Style Sheet
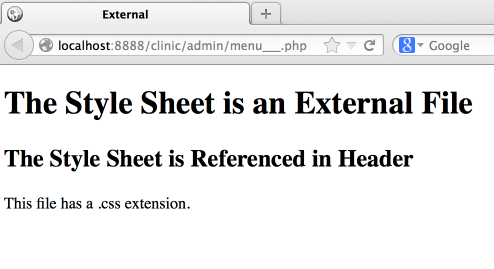
So far CSS styles have been included in our individual web pages. Now we will put this in a seperate file. The benefit of this is the CSS styles will be available to all the pages of the application. Generally it’s a good idea to create a single style sheet for an application.
- Add a new HTML page called External.html to the project you created in Exercise 1. Do this by right-clicking the project name in Solution Explorer and using the context menu. Set this HTML page as the start page by again using the context menu.
- Add a new Style Sheet called mystyle.css to the project. Select Add>New Item … from the context menu to do this.
h1 {color: green}
h2 {color: #dda0dd}
p {color: rgb(0,0,255)} - Replace the content of the page with the HTML and CSS tags and text below
<!DOCTYPE html>
<html xmlns=”http://www.w3.org/1999/xhtml”>
<head>
<title>External</title>
<!–The Style Sheet is an external file–>
<link rel=”stylesheet” type=”text/css”
href=”mystyle.css” />
</head>
<body>
<h1>The Style Sheet is an External File</h1>
<h2>The Style Sheet is Referenced in Header</h2>
<p>This file has a .css extension.</p>
</body>
</html> - View code
Exercise 7 Use Multiple Styles
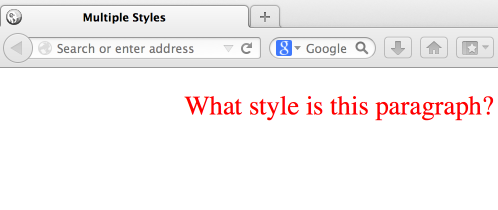
Cascading Style Sheets actually cascade, that is, many style sheets can work together. The rule is, when several styles conflict, the most local style is the one that is applied. An external, internal and browser based style will be applied to a page.
- Add a new HTML page to the project you created in Exercise 1. Do this by right-clicking the project name in Solution Explorer and using the context menu. Set this HTML page as the start page by again using the context menu.
- Add a new Style Sheet called pstyle.css to the project. Select Add>New Item … from the context menu to do this.
- Replace the content of pstyle.css with the CSS tags below.
p { color: red;
text-align: left;
font-size: 8pt } - Test the project by building and executing it. Does the formatted page appear in a browser?
<!DOCTYPE html>
<html xmlns=”http://www.w3.org/1999/xhtml”>
<head>
<title>Multiple Styles</title>
<!– <p> has an external, internal and browser based style–>
<link rel=”stylesheet” type=”text/css”
href=”pstyle.css” />
<style type=”text/css”>
p
{
text-align: right;
font-size: 20pt;
}
</style>
</head>
<body>
<p>What style is this paragraph?</p>
</body>
</html> - View code
Exercise 8 Style Images
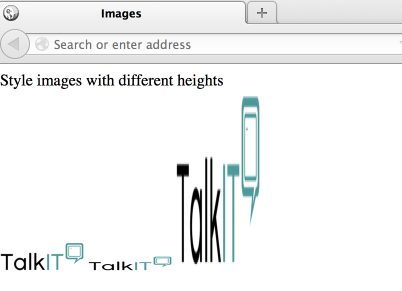
Styles can also be applied to images. An image will be styled to different heights using class selector.
- Add a new HTML page to the project you created in Exercise 1. Do this by right-clicking the project name in Solution Explorer and using the context menu. Set this HTML page as the start page by again using the context menu.
- Replace the content of the page with the HTML and CSS tags and text below.
- Test the project by building and executing it. Does the formatted page appear in a browser?
<!DOCTYPE html>
<html xmlns=”http://www.w3.org/1999/xhtml”>
<head>
<title>Images</title>
<style type=”text/css”>
/*Style images with different heights*/
img.normal
{height: auto;}
img.small
{height: 15px;}
img.big
{height: 180px;}
</style>
</head>
<body>
Style images with different heights
<br />
<img class=”normal” src=”Logo.JPG” width=”84″ height=”95″ />
<img class=”small” src=”Logo.JPG” width=”84″ height=”95″ />
<img class=”big” src=”Logo.JPG” width=”84″ height=”95″ />
</body>
</html> - View code
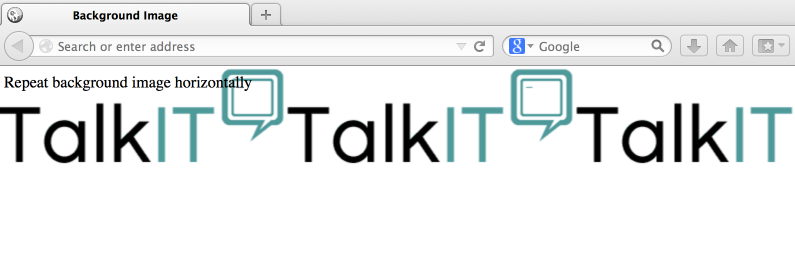
Exercise 9 Style an Background Image
Finally, we’ll style a background image on a page. The <body> tag is styled to repeat the image horizontally.
- Add a new HTML page to the project you created in Exercise 1. Do this by right-clicking the project name in Solution Explorer and using the context menu. Set this HTML page as the start page by again using the context menu.
- Replace the content of the page with the HTML and CSS tags and text below.
- Test the project by building and executing it. Does the formatted page appear in a browser?
<!DOCTYPE html>
<html xmlns=”http://www.w3.org/1999/xhtml”>
<head>
<title>Background Image</title>
<style type=”text/css”>
/*Repeat background image horizontally*/
body
{
background-image: url(‘Logo.jpg’);
background-repeat: repeat-x;
}
</style></head>
<body>
Repeat background image horizontally
</body>
</html> - View code


If you would like to see more content like this in the future, please fill-in our quick survey.