In this tutorial you will learn the basics of ASP.NET and how to use custom model bindings. This will allow you to write a simple ASP.NET site that you will then run. The program will be a visual studio application
About this Tutorial
Objectives
Delegates will learn to develop web applications using C# 4.0. After completing this course, delegates will be able to:
Use Visual Studio 2012 effectively
Create commercial ASP.NET Web Applications
Develop user interfaces using Master Pages, Site Navigation and Themes
Audience
This course has been designed primarily for programmers new to the .Net development platform. Delegates experience solely in Windows application development or earlier versions of ASP.Net will also find the content beneficial.
Prerequisites
No previous experience in ASP.NET programming is required. But any experience you do have in programming will help. Also no experience in visual studio is required. But again any experience you do have with programming development environments will be a valuable.
Experience using a contemporary OO language such as C++ or C# would be useful but is not required.
Not what you are looking? Try the next tutorial – ASP.NET MVC4 Using Ajax and jQuery
In this tutorial we will enhance the film application you last worked on in the “Implementing Navigation in ASP.NET MVC4” lab.
Managing state is an important feature of any web application. It allows data to be retained both on a page and shared between pages. This means our application pages can “remember” the data it works with. We will explore:
Passing hidden fields between pages.
Managing session state.
We will also see some important MVC techniques:
Having multiple forms on the same page.
Browser redirection.
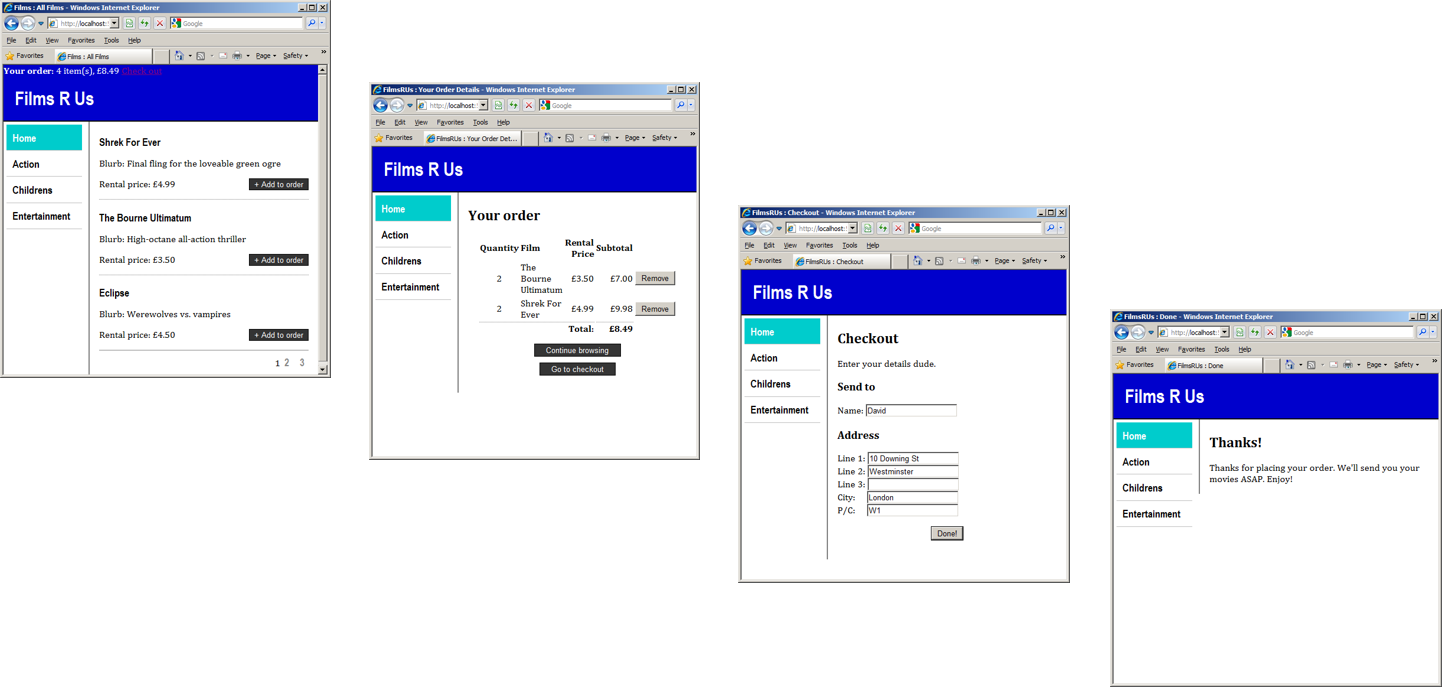
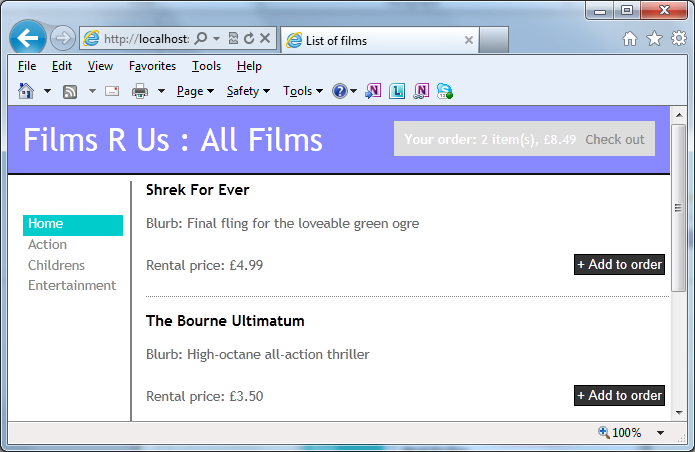
The application is based on our FilmsRUsOnline tutorial and will let us order films and check out.
The application will consist of :
Controller for managing order-related requests – OrderController
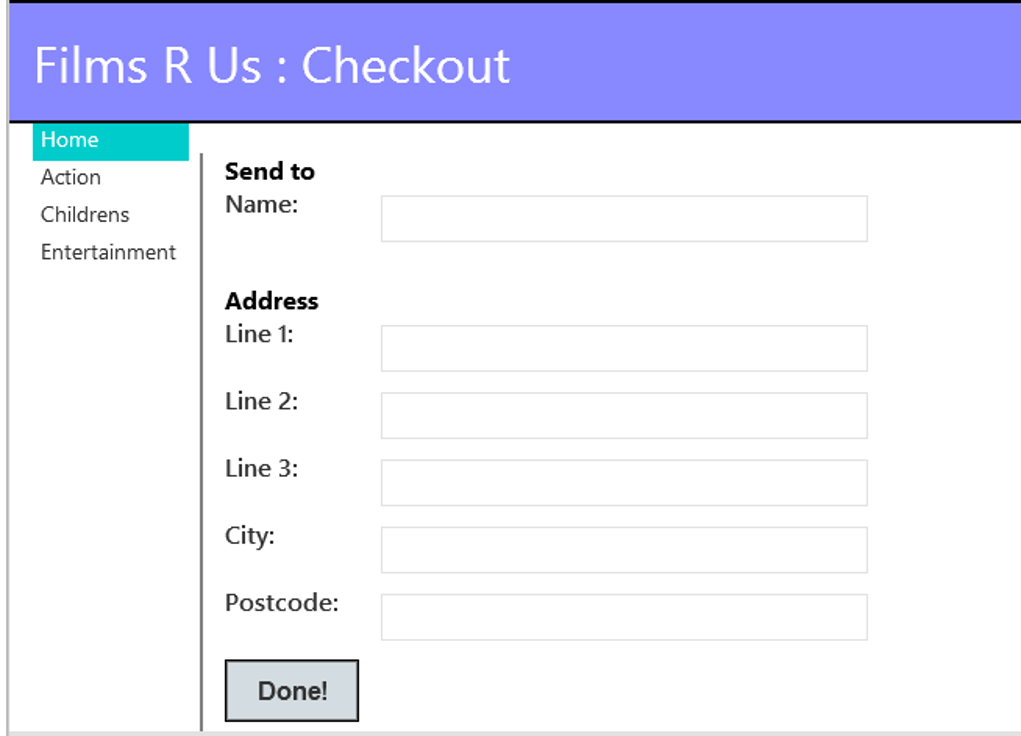
Views for displaying order-related details – Index.cshtml, Checkout.cshtml, Done.cshtml, _Summary.cshtml
View model for conveying order-related details – OrderIndexViewModel.cs
Domain model for order-processing business rules – Order.cs
Provides methods to add/remove/clear items in the order.
Calculates the total cost of the order.
We also have an Item entity class:
Identify a particular film.
Keeps a count of the number of times the user has added the film to the order.
The Order Class; in the Order class we have two important methods AddItem(Film film, int quantity) and RemoveItem(Film film). AddItem() will add the film to the order, if the object is currently not in the order. Or it will increment the quantity of that item, if it is in the order. RemoveItem() will remove the film from the current order no matter what quantity you have of the film.
                public class Order

                {

                 private List items = new List();

                 public IList Items { get { return items.AsReadOnly(); } }

                 public void AddItem(Film film, int quantity)

                 {

                  var item = items.FirstOrDefault(x => x.Film.FilmID == film.FilmID);

                  if (item == null)

                   items.Add(new Item { Film = film, Quantity = quantity });

                  else

                   item.Quantity += quantity;

                 }

                 public void RemoveItem(Film film)

                 {

                  items.RemoveAll(x => x.Film.FilmID == film.FilmID);

                 }

                 public void Clear()

                 {

                  items.Clear();

                 }

                 public decimal TotalCost()

                 {

                  return items.Sum(x => x.Film.RentalPrice * x.Quantity);

                 }

                }
The Item class; this contains the properties of Film and Quantity of which Film is, amazingly, of type Film. Quantity is expressed as an integer.
                public class Item

                {

                 public Film Film { get; set; }

                 public int Quantity { get; set; }

                }
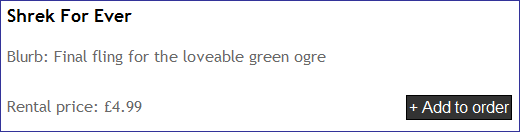
The domain model Order performs business operation such as Add and Remove; these can be triggered from the UI and hence the _FilmSummary.cshtml can be extended with an “Add to Order” button.
                @model Domain.Entities.Film

                <div class="item">

                 <h4>@Model.Title</h4>

                 <p>Blurb: @Model.Blurb</p>

                 @using (Html.BeginForm("AddToOrder", "Order")) {

                   @Html.HiddenFor(x => x.FilmID)

                   @Html.Hidden("returnUrl", Request.Url.PathAndQuery)

                   <input type="submit" value="+ Add to order" />

                 }

                 <p>Rental price: @Model.RentalPrice.ToString("c")</p>

                </div>
It makes good sense to have separate controller that is dedicated to handling order-related requests, hence the controllerOrderController. A good approach to manage per-user order details is for controllers to obtain the information they need via parameters, using external agents. In this case we use _FilmSummary.cshtml.
                public class OrderController : Controller

                {

                 ...

                 public RedirectToRouteResult AddToOrder(Order order, int filmID, string returnUrl)

                {

                 ...

                }

                 ...

                }
The model binding mechanism is powerful and extensible:
We can define a custom binding, to supply action methods with additional objects.
Specifically, we’ll define a custom model binding for action methods of OrderController.
We’ll get an order object from our current session or create a new one and supply it to the action method.
This is the Custom model binder – This has been placed in the folder Plumbing and is called OrderModelBinder.
                public class OrderModelBinder : IModelBinder

                {

                 private const string orderSessionKey = "_order";

                 public object BindModel(ControllerContext controllerContext,

                 ModelBindingContext bindingContext)

                 {

                   // Return the order from Session (or create it if it doesn't exist).

                   Order order = (Order) controllerContext.HttpContext.Session[orderSessionKey];

                   if (order == null)

                   {

                    order = new Order();

                    controllerContext.HttpContext.Session[orderSessionKey] = order;

                   }

                  return order;

                 }

                }
ASP.NET MVC must know about the custom model binder, and when to use it – add the following to Global.asax.cs. This will tell MVC to use custom model binder whenever an action method needs an Order object.
                public class MvcApplication : System.Web.HttpApplication

                {

                 ...

                 protected void Application_Start()

                 {

                  ...

                  // Tell ASP.NET MVC to use our controller factory.

                  ControllerBuilder.Current.SetControllerFactory(new NinjectControllerFactory());

                      // Tell ASP.NET MVC to use our model binder.

                      ModelBinders.Binders.Add(typeof(Order), new OrderModelBinder());

                 }

                }
This causes an HTTP 302 redirection, telling the browser to issue another HTTP request immediately to go to a specified URL
Here is the full implementation of AddToOrder()
                public class OrderController : Controller

                {

                 private IFilmsRepository filmsRepository;

                 public OrderController(IFilmsRepository filmsRepository)

                 {

                  this.filmsRepository = filmsRepository;

                 }

                 public RedirectToRouteResult AddToOrder(Order order, int filmID, string returnUrl)

                 {

                  Film film = filmsRepository.Films.FirstOrDefault(x => x.FilmID == filmID);

                  order.AddItem(film, 1);

                  return RedirectToAction("Index", new { returnUrl });

                 }

                 ...

                }
Now to create an action method that removes a film from the order – RemoveFromOrder().
                public class OrderController : Controller

                {

                 ...

                 public RedirectToRouteResult RemoveFromOrder(Order order, int filmID, string returnUrl)

                 {

                  Film film = filmsRepository.Films

                     .FirstOrDefault(x => x.FilmID == filmID);

                     order.RemoveItem(film);

                     return RedirectToAction("Index", new { returnUrl });

                 }

                 ...

                }
Both AddToOrder() and RemoveFromOrder() cause a browser-redirect to the Index() action method hence this needs to be implemented in OrderController.
                public class OrderController : Controller

                {

                 ...

                 public ViewResult Index(Order order, string returnUrl)

                 {

                  return View(new OrderIndexViewModel {

                   Order = order,

                   ReturnUrl = returnUrl

                  });

                 }

                 ...

                }
The Purpose of Index() is to display the order – passes a new view-model object into the view.
                public class OrderIndexViewModel

                {

                 public Order Order { get; set; }

                 public string ReturnUrl { get; set; }

                }
Here is the default view for the Index()action method – displays the items in order and also displays a hyper-link to return to their previous URL.
                @foreach (var item in Model.Order.Items) {

                    ...@item.Quantity

                    ...@item.Film.Title

                    ...@item.Film.RentalPrice.ToString("c")

                    ...@((item.Quantity * item.Film.RentalPrice).ToString("c"))

                    @using (Html.BeginForm("RemoveFromOrder", "Order")) {

                      @Html.Hidden("FilmId", item.Film.FilmID)

                      @Html.HiddenFor(x => x.ReturnUrl)

                      <input type="submit" value="Remove" />

                    }

                }

                ...@Model.Order.TotalCost().ToString("c")

                ...<a href="@Model.ReturnUrl">Continue browsing</a>

                ...@Html.ActionLink("Go to checkout", "Checkout")
Each client to the website creates a separate session for their visit. Session state is server-side storage for a particular client.
The classic example of session state is a per-client shopping cart.
The shopping cart is retained in storage across multiple post-backs.
A controller action method can get data directly from the session state and pass it to view to be rendered.
Session state is a name-value collection.
Accessed via HttpContext.Session in an action method.
It’s an instance of HttpSessionState.
Session state remains allocated until:
The session time-out occurs, usually twenty minutes.
The code explicitly abandons the session.
The web application itself is restarted.
You can add any kind of object to session, as follows:
                public ActionResult SomeActionMethod()

                {

                 HttpContext.Session["Cart"] = new List();

                 HttpContext.Session["NumVisits"] = 1;

                 HttpContext.Session["LastVisit"] = DateTime.Now;

                }
To access an item in session state you can use its key, as follows:
                List cart = (List) HttpContext.Session["Cart"];

                if (cart != null)

                 ...
You can remove an item; both key and value from session state by its key as follows:
                HttpContext.Session.Remove("Cart");

                // Or all

                HttpContext.Session.RemoveAll();
It is also possible to abandon session state as follows:
HttpContext.Session.Abandon();
Session State is highly configurable, this is from web.config. For full details see https://msdn.microsoft.com/en-us/library/h6bb9cz9(v=VS.100).aspx.
                <sessionState

                mode="[Off | InProc | StateServer | SQLServer | Custom]"

                timeout="number of minutes"

                cookieName="session identifier cookie name"

                cookieless="[true | false | AutoDetect | UseCookies | UseUri | UseDeviceProfile]"

                regenerateExpiredSessionId="[True |False]"

                sessionIDManagerType="session manager type"

                sqlConnectionString="sql connection string"

                sqlCommandTimeout="number of seconds"

                allowCustomSqlDatabase="[True | False]"

                useHostingIdentity="[True | False]"

                stateConnectionString="tcpip=server:port"

                stateNetworkTimeout="number of seconds"

                customProvider="custom provider name"

                compressionEnabled="[True | False]"

                sqlConnectionRetryInterval="number of seconds">

                <providers>...</providers>

                </sessionState>
Application State
All clients to a website may want to share data with each other. Application state provides global server-side storage for all clients.
Accessible by all clients.
Accessible by all pages in the web application.
Application state is a name-value collection.
Accessed via HttpContext.Application in an action method.
It’s an instance of HttpApplicationState.
Application state remains allocated until:
The web application is restarted.
You can add any kind of object to application state, as follows:
                HttpContext.Application.Lock();

                HttpContext.Application["copyright"] = "Acme Inc";

                HttpContext.Application["visitCount"] = 1;

                HttpContext.Application.Unlock();
You can access an item in application state by its key, as follows:
                object i = HttpContext.Application["visitCount"];

                if (i == null)

                 HttpContext.Application["visitCount"] = 1;

                else

                 HttpContext. Application["visitCount"] = (int)i + 1;
You can also remove an item from application state by its key, as follows:
                HttpContext.Application.Remove("visitCount");

                // to remove all

                HttpContext.Application.RemoveAll();
In the next tutorials we will enhance the application further by using Ajax and Jquery to allow us to update specific part of the webpage without the need to reload the whole page and much more.
Well done. You have completed the tutorial in the MVC4 course. The next tutorial is
If you liked this post, please comment with your suggestions to help others.
If you would like to see more content like this in the future, please fill-in our quick survey.
Manage cookie consent
You can view this website without consenting to extra cookies. However you will need to accept the 'marketing' cookies to send messages via the contact forms & see any maps displayed on the site
Functional
Always active
Cookies necessary for the website to work.
Preferences
The technical storage or access is necessary for the legitimate purpose of storing preferences that are not requested by the subscriber or user.
Statistics
The technical storage or access that is used exclusively for statistical purposes.Cookies used to track user interaction on the site, which helps us to evaluate & improve the website.
Marketing: Forms & additional content (Marketing)
We need your permission to place ‘marketing’ cookies, so you are able to use the contact forms & see embedded content e.g. videos and maps. - - - - We have added protection to our contact forms to help prove that a human (rather than a spambot) is filling

If you would like to see more content like this in the future, please fill-in our quick survey.