6. CSS3 Techniques

About this Tutorial

Objectives

Delegates will learn to develop applications using HTML5/CSS3 and JS. After completing this course, delegates will be able to:

  • Use Visual Studio 2012 effectively
  • Create commercial HTML5 Web Applications
  • Develop Websites that may use web sockets, animations and geolocation

Audience

This course has been designed primarily for programmers new to the .Net development platform. Delegates experience solely in Windows application development or earlier versions of HTML/CSS and JavaScript will also find the content beneficial.

Prerequisites

No previous experience in web programming is required. But any experience you do have in programming will help. Also no experience in browser IDE’s is required. But again any experience you do have with programming development environments will be a valuable.

Download Solutions

HTML tutorial


Overview
Estimated Time – 1 Hour

Not what you are looking? Try the next tutorial – CSS3 Transformations and Animations


Setting the Scene?

  1. Overview of CSS3
    • CSS plays an important role alongside HTML5
      • You are strongly advised to delegate presentational issues to CSS
      • Just use HTML5 for semantic content
    • CSS3 introduces several new features, including:
      • Backgrounds and borders
      • Enhanced color support
      • Transforms
      • Selectors
      • Enhanced font support
      • and a few more
  2. Vendor-Specific Prefixes
    • Some CSS3 features are not universally supported yet
      • Vendors use vendor-specific prefixes for some CSS3 features
      • Denotes partial support for emerging CSS3 standards
    • Here are some of the common vendor-specific prefixes:
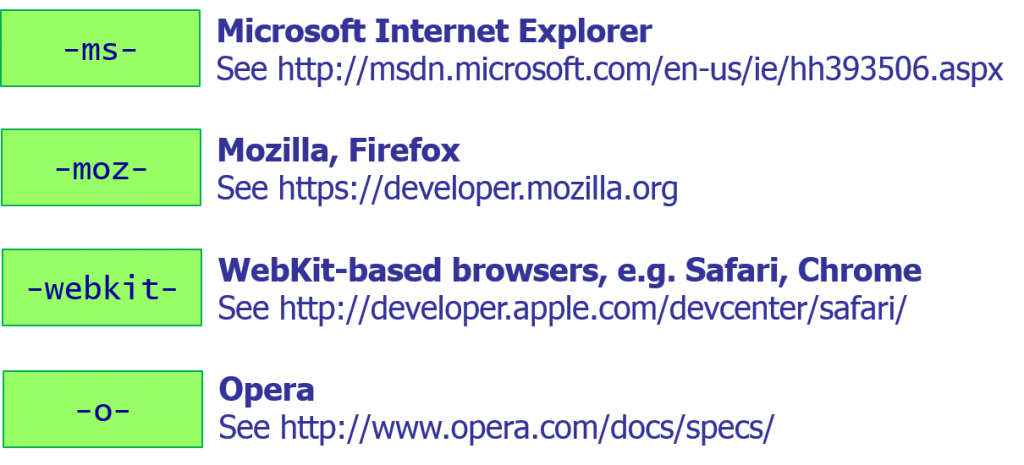
      T6P1 CSS3
    • For Example
      h4 {
       ...
       -ms-transform:   rotate(-45deg);
       -webkit-transform: rotate(-45deg);
       -moz-transform:  rotate(-45deg);
       -o-transform:   rotate(-45deg);
      }

Lab 1: Controlling layout

Lab 1: Controlling layout
  1. Multiple Column Layout
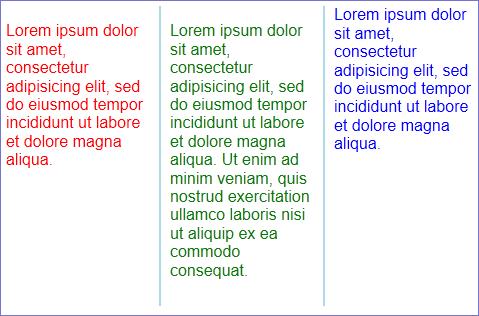
    • CSS3 allows you to create multiple column layouts
    • To configure multiple column layout:
      • column-width – Optimal width for columns
      • column-count – Optimal number of columns
      • column-gap – Width of gap between columns
      • column-rule – Width, style, and color of rule between columns
      • column-span – Number of columns a content block spans
    • To specify when content should break between columns:
      • break-before – page, column, avoid-page, avoid-column
      • break-after – page, column, avoid-page, avoid-column
      • break-inside – avoid-page, avoid-column
    • Examples of multiple columns (e.g. open in IE10)
  2. Grid Layout
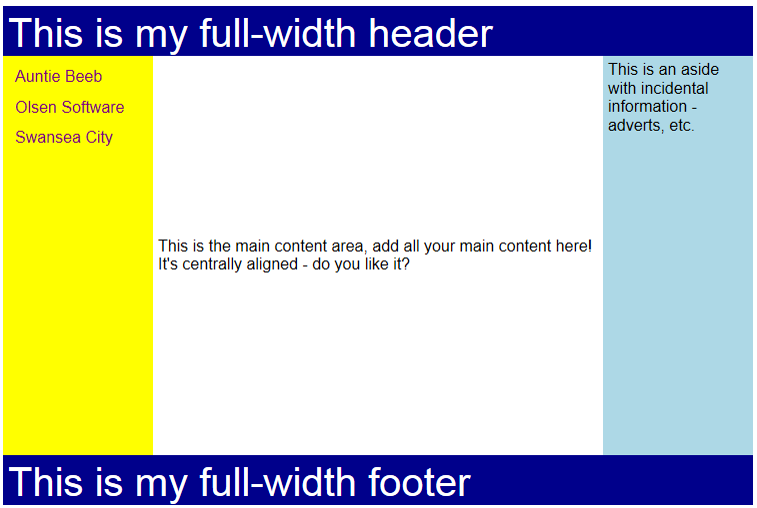
    • CSS3 supports grid layout
      • Set the display property to grid
      • Set the grid-rows and grid-columns properties, to indicate the size of the rows and columns
        someElement {
         display: grid;
         grid-rows:   50px 400px 50px; 
         grid-columns: 150px 450px 150px;
         ...
        }
    • Note that some browsers require vendor-specific prefixes
      • E.g. for Microsoft IE 10:
        someElement {
         display: -ms-grid;
         -ms-grid-rows:   50px 400px 50px; 
         -ms-grid-columns: 150px 450px 150px;
         ...
        }
    • To position an element in a particular cell:
      • Set grid-row and grid-column for the element
      • Note that the first cell is row 1, column 1!
    • To indicate an element should span more than one cell:
      • Set grid-row-span and grid-column-span
    • To specify the alignment for an element in a cell:
      • Set grid-row-align and grid-column-align
      • Allowed values are start, end, center, and stretch
    • Note: Some browsers require vendor-specific properties
      • E.g. -ms-grid-row, -ms-grid-column, etc.
    • Example of grid layout
      • Open GridLayout.html in IE 10 – This example uses Microsoft prefixes -ms-
      • View code file.
      • T6P3 CSS3

  3. Additional Layout Techniques
    • Table layout (since CSS2) – See https://www.w3.org/TR/CSS2/tables.html
    • Flexible box layout (new in CSS3) – See https://www.w3.org/TR/css3-flexbox/

Lab 2: Backgrounds, borders, colours, and text

Lab 2: Backgrounds, borders, colours, and text
  1. Drawing Outlines
    • CSS3 enhances the classic CSS box model with outlines
      • Outlines are drawn above the margin box
      • Outlines are defined relative to the box border
    • Individual outline properties
      outline-width: amount
      outline-style: a style (e.g. none, dotted, dashed, solid)
      outline-color: aColor
      outline-offset: distance between outline and border
    • Shorthand outline property
      outline: theOutlineWidth theOutlineStyle theOutlineColor
  2. Controlling Overflow
    • CSS3 allows you to define what should happen if content overflows the box that contains it
      • Set the overflow-x and overflow-y properties
      • Values are visible (the default), hidden, and scroll
    • CSS3 also allows you to mark a text block as resizable (if the overflow property is hidden or scroll)
      • Set the resize property
      • Values are none (the default), both, horizontal, vertical
  3. Creating Rounded Corners
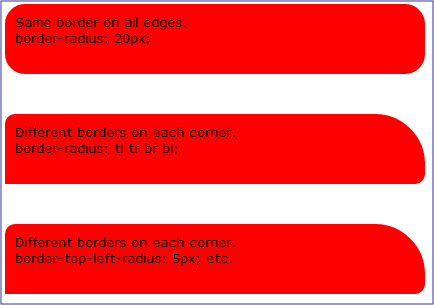
    • You can apply rounded corners in CSS3 – To apply the same rounding to each corner use this code, it can be a length or a percentage e.g. 20px, 10em or 5% for amount
      border-radius: amount;
    • You can specify separate rounding on each corner
      • You can use short-cut syntax: e.g. ul stands for upperleft, ur = upperright etc…
        border-radius: ul ur lr ll;
    • Or you can set each corner individually:
      border-top-left-radius: amount;
      border-top-right-radius: amount;
      border-bottom-left-radius: amount;
      border-bottom-right-radius: amount;
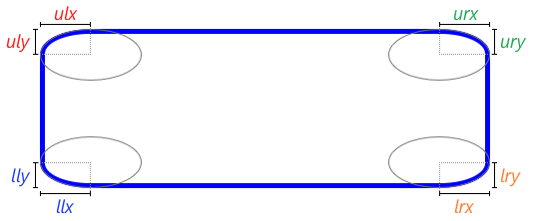
    • You can also specify elliptical rounding for a corner
      • Define the x radius and the y radius separately
      • Note, this isn’t universally supported yet
    • To set one corner:
      border-top-left-radius: x y;

      T6P4
    • To set all corners:
      border-radius: ulx urx lrx llx /
            uly ury lry lly;

      T6P5
    • Examples – See BackgroundsBordersColours\Borders.html
    • View code file.
    • T6P6

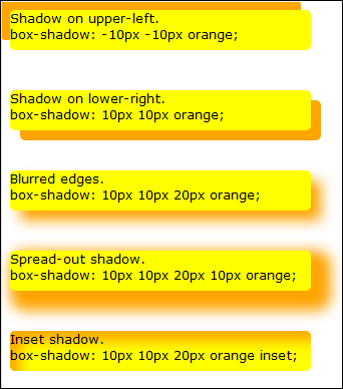
  4. Creating Drop Shadows
    • You can add drop shadows inside or outside elements
      box-shadow: horiz-offset
            vert-off
            blur-distance
            spread-distance
            color
            inset;

      • horiz-offset (required)
        – Specifies how far to the right (+ve)
        or to the left (-ve) the shadow extends
      • vert-offset (required) –
        Specifies how far down (+ve) or up (-ve)
        the shadow extends
      • blur-distance
        – Positive length, indicates distance between
        start and end of the blur
      • spread-distance
        – Specifies how much the shadow shape
        expands (+ve) or contracts (-ve) in all directions
      • color (required for some browsers) –
        Color of the shadow (e.g. gray or #808080)
      • inset
        – Use this keyword if you want an inner shadow
        rather than an outer shadow
    • Examples – See BackgroundsBordersColours\Shadows.html
    • View code file.
    • T6P7

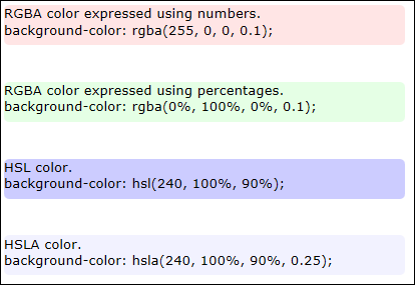
  5. Setting Colours
    • CSS3 provides several ways to set colours…
      • rgba(r, g, b, a)
        • Red, Green, and Blue (0 to 255, or 0% to 100%)
        • Alpha (0.0 = completely transparent, 1.0 = completely opaque)
      • hsl(h, s, l)
        • Hue, i.e. color’s angle on the color wheel (0=R, 120=G, 240=B)
        • Saturation (0 to 100%)
        • Lightness (0 to 100%)
      • hsla(h, s, l, a)
        • Hue, saturation, and lightness as above
        • Alpha (0.0 = completely transparent, 1.0 = completely opaque)
    • Example – See BackgroundsBordersColours\Colours.html
    • View code file.
    • T6P8

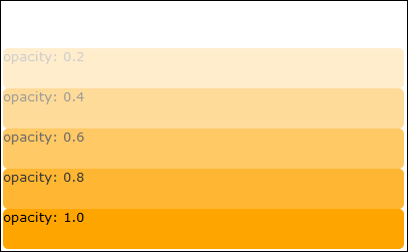
    • You can also set the opacity style on any element
      • Similar to the alpha component of RGBA and HSLA values
      • Values 0.0 (completely transparent) to 1.0 (completely opaque)
    • Example – See BackgroundsBordersColours\Opacity.html
    • View code file.
    • T6P9

      >

  6. Styling Text
    • To indent first line of each text block
      • Set the text-indent property
        text-indent: 5rem;
    • To tell browser how to hyphenate
      • Set the hyphens property
      • Allowable values are none, manual, or auto
      • For manual hyphens, use ­ to indicate hyphenation points
        hyphens: manual;
    • To define spacing between words
      • Set the word-spacing property
        word-spacing: 5px;
    • To define text shadows
      • Set the text-shadow property
        text-shadow: horiz-offset
               vert-off
               blur-distance
               color;

Lab 3: Selectors

Lab 3: Selectors
  1. Overview
    • CSS selectors are patterns that match against elements in a tree
      • Enable you to use CSS to select nodes in an HTML document
      • No need for DOM / JavaScript coding
    • CSS3 introduces several new selectors
      • We’ll take a look at the new selectors in this section
      • Also see https://www.w3.org/TR/css3-selectors/
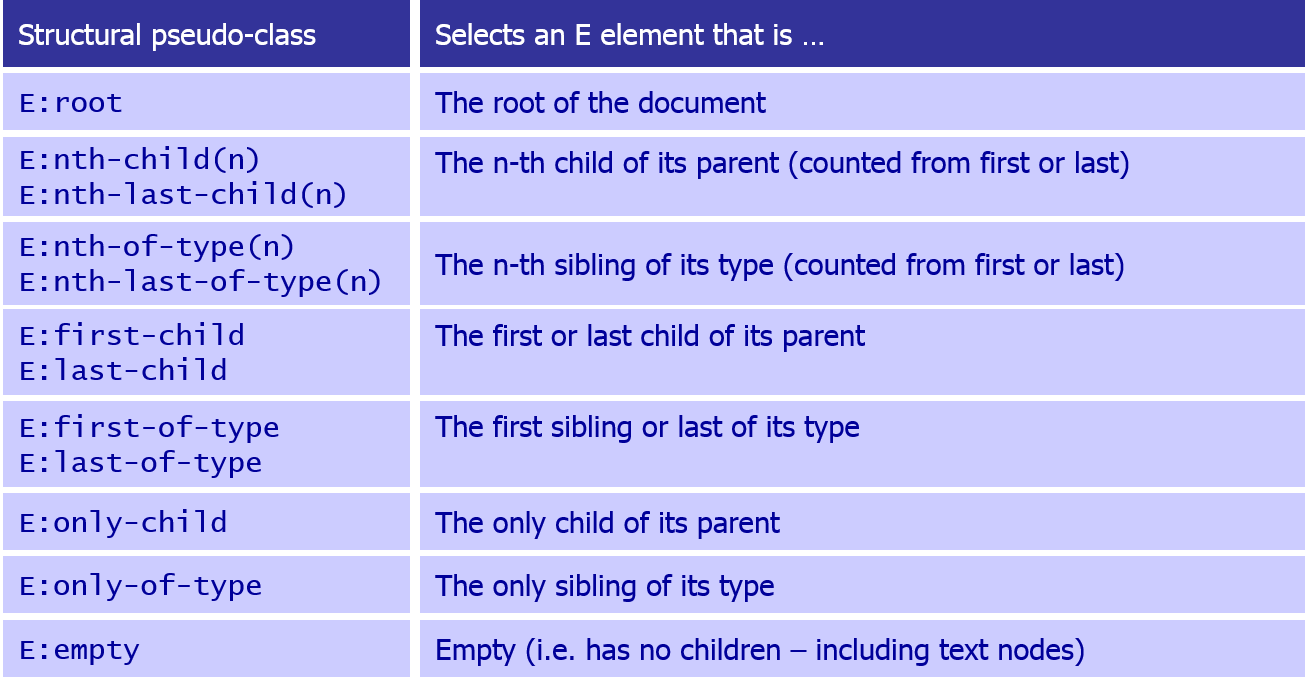
  2. Structural Pseudo-Classes
    • Structural pseudo-classes permit selection based on an element’s position in the document tree
      • E.g. root element
      • E.g. nth-child
      • E.g. first child of a certain type
    • Simple example – See Selectors\StructuralPseudoClasses1.html
    • View code file.
    • ...
      tr:nth-child(odd) {
        background-color: yellow;
      }
      tr:nth-child(even) {
        background-color: orange;
      }
      ...

      T6P10

    • Uses – For n, you can specify:
      • A number, e.g. 5
      • A cyclic condition, e.g. 3n
      • An expression, e.g. 3n+1
      • The words odd or even

      T6p11

    • Examples – See Selectors\StructuralPseudoClasses2.html
    • View code file.
  3. Additional Selector Techniques
    • UI element states pseudo-classes:
      T6P12
    • The negation pseudo-class:
      T6P13
    • The UI element fragments pseudo-element:
      T6P14
  4. Combinators
    • CSS combinators enable you to combine selectors
      • Descendant combinator
        h1 em
        div * p
        form * input[type='text']
      • Child combinator
        span > p
        span ul>li span
      • Adjacent sibling combinator
        h3 + p
        h3.loud + p
      • General sibling combinator
        h3 ~ p
        h3.loud ~ p


Well done. You have completed the tutorial in the HTML5/CSS3/JS course. The next tutorial is

7. CSS3 Transformations and Animations


Back to beginning
Copyright © 2016 TalkIT®


If you liked this post, please comment with your suggestions to help others.
If you would like to see more content like this in the future, please fill-in our quick survey.
Scroll to Top