In this tutorial you will learn the core of C# and its variable types. This will allow you to write a simple C# program that you will then compile. The program will be a Visual Studio Form application
About this Tutorial
Objectives
Delegates will learn to develop applications using C# 4.5. After completing this course, delegates will be able to:
Use Visual Studio 2012 effectively
Create commercial C# Web Applications
Develop multi-threaded applications, Use WCF and LINQ
Audience
This course has been designed primarily for programmers new to the .Net development platform. Delegates experience solely in Windows application development or earlier versions of C# will also find the content beneficial.
Prerequisites
No previous experience in C# programming is required. But any experience you do have in programming will help. Also no experience in Visual Studio is required. But again any experience you do have with programming development environments will be a valuable.
Experience using a contemporary OO language such as C++ or C# would be useful but is not required.
Overview
C# sharp is a strongly typed language – This means that every expression that will form a value, any variable, any constant will have a type associated with it. There are more complex types than that of integer and double but also types for file systems, collections etc…
Not what you are looking? Try the next tutorial – Defining Members
Lab 1: Essential concepts
Lab 1: Essential concepts
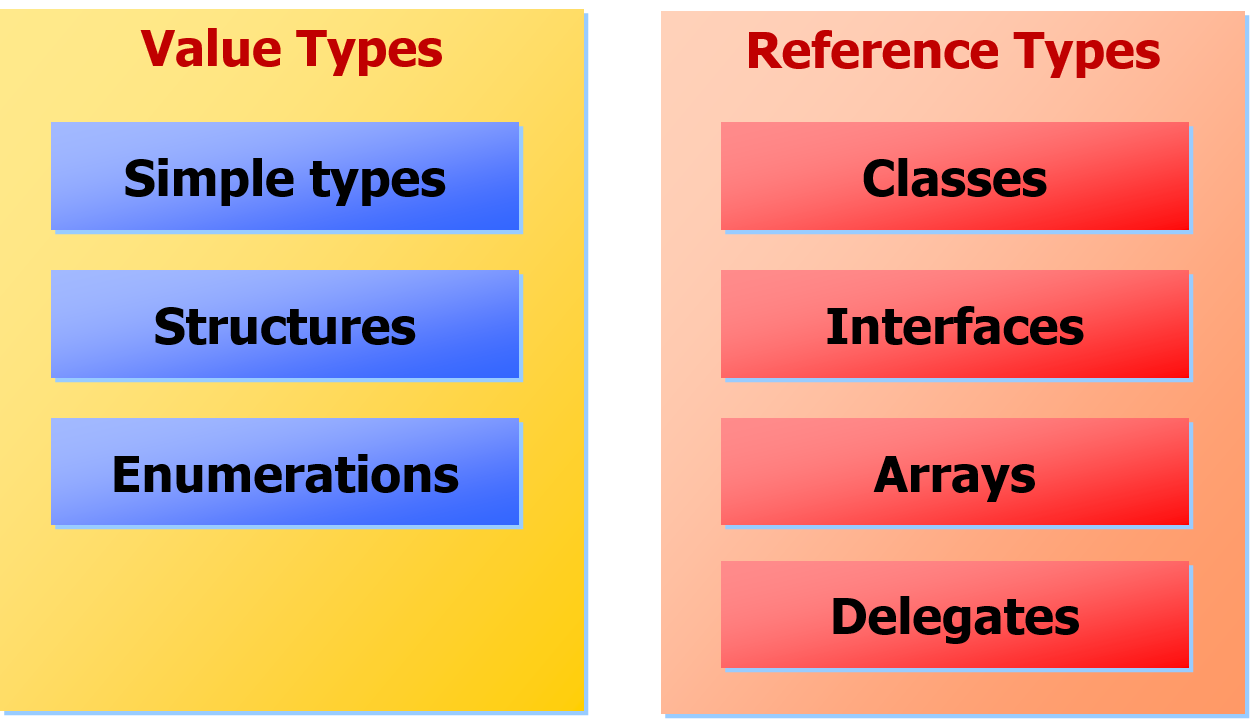
What is the difference between a Reference Type and a Value Type.
Reference types represent the ‘major entities’ in your OO design, such as classes and interfaces. They are Allocated on the ‘managed heap‘ and will exist until the garbage collector periodically de-allocates unreachable objects.
Value types represent the ‘small things’ in your app, such as numerical types. They are allocated on the stack and will be de-allocated at the end of a method assuming it is a local variable.
Type Visibility – It can be defined in two manners:
public = accessible from any assembly – public class ThisClassCanBeAccessedFromAnyAssembly {...}
internal = accessible from this assembly (default) – internal class ThisClassIsInternalToThisAssembly {...}
Protected internal – Accessible by this type and subtypes, and by types in this assembly.
public class MyClass

{

 public             int mPublicMember = 0;

 private            int mPrivateMember = 0;

                    int mAnotherPrivateMember = 0;

 protected          int mProtectedMember = 0;

 internal           int mInternalMember = 0;

 protected internal int mProtectedInternalMember = 0;

}
Defining classes – here is a simple class, a class effectively represent your blue prints for creating an object and when you use that blueprint you end up with a product. For example this is a blueprint for a bank account and so you have variables for balance, the holders name and methods like deposit and withdraw. public class Account
{
private string holder;
private double balance;
public void Deposit(double amount)
{
this.balance += amount;
}
public void Withdraw(double amount)
{
this.balance -= amount;
}
public override string ToString()
{
return this.holder + ", £" + this.balance;
}
...
}
You can define constructors to initialize objects; a constructor is called when you create an object. You can define any number of constructors assuming they have different parameters. public class Account
{
private string holder;
private double balance;
public Account(string holder, double balance)
{
this.holder = holder;
this.balance = balance;
}
...
}
Creating an Object – Template, this can also be called insatiate, e.g you can insatiate an object. The main part to pay attention to is that you use the keywordnew to do this and supply the needed variables at the same time- Typename variable = new Typename(params-to-constructor);
Creating an Object – Example – static class ClassesAndObjectsDemo
{
public static void DoDemo()
{
Account acc1 = new Account("Emily", 2000); // creates an account for Emily, with starting balance of 2000
acc1.Deposit(500);
acc1.Withdraw(200);
System.Console.WriteLine("{0}", acc1);
}
}
A namespace is a logical cluster of related types – You can define namespaces corresponding to the UML packages in your OO design.
.NET namespaces don’t imply a particular deployment layout – namespace Accounting
{
public class BankAccount {...} // Superclass
public class SavingsAccount : BankAccount {...} // Subclass
public class CurrentAccount : BankAccount {...} // Subclass
public class OverdraftFacility {...} // Misc. class
}
Use a using statement to import types from a namespace – using System; // Import types from System namespace.
using Accounting; // Import types from Accounting namespace.
namespace DemoTypes
{
static class UseNamespaceDemo
{
public static void DoDemo()
{
BankAccount[] accs = new BankAccount[]
{
new SavingsAccount(),
...
}
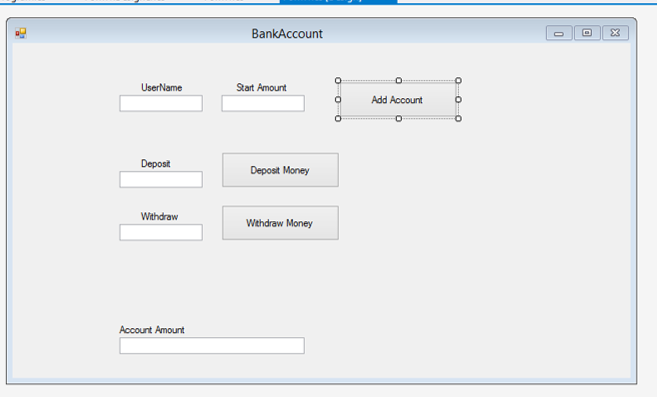
Add this code to the Form1 classvariables so we can use it throughout the application – Account acc1;
lets add the Account class First – Open up Form1.cs and add this code once the partial Form1 class ends – public class Account
{
private string holder;
private double balance;
public void Deposit(double amount)
{
this.balance += amount;
}
public void Withdraw(double amount)
{
this.balance -= amount;
}
... // See code file
}
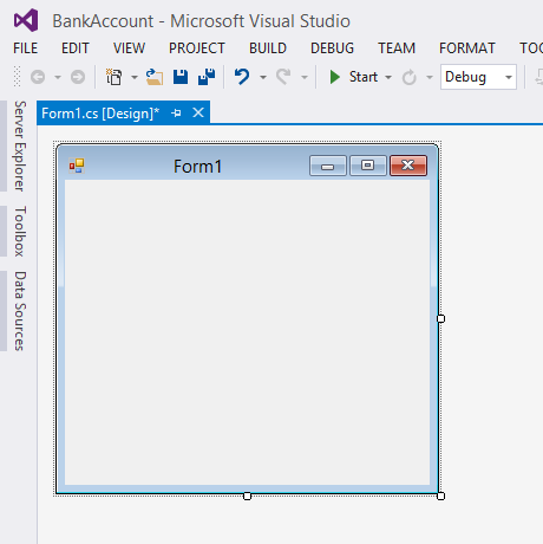
Now double click each button in the Form1 designer and it will open up the Form1.cs and create an eventhandler for you.
Using structures – static class StructuresDemo
{
public static void DoDemo()
{
Money[] values = new Money[5]; // Create an array
values[0] = new Money(9, 50); // Copy new objects into array slots
values[1] = new Money(4, 80);
values[2] = new Money(8, 70);
values[3] = new Money(2.50);
values[4] = new Money(6);
Console.WriteLine("Unsorted array:");
foreach (Money v in values) // Use foreach to iterate over array
{
....
}
Enumerations – Enums define a bounded set of whole numbers – public enum Connection
{
DialUp, ISDN, BroadBand, None=-1
}
Connection con = Connection.ISDN;
Console.WriteLine("Connection: {0}", con);
Console.WriteLine("Integral value: {0}", (int)con);
Underlying type is int, or you can specify: public enum MonthName : byte
{
January=1, February, March, April, May, June, July, August, ...
}
MonthName mn = MonthName.July;
Console.WriteLine("Month name: {0}", mn);
Console.WriteLine("Integral value: {0}", (byte)mn);
You can assign null to any nullable-type variable – myNullableInt = null; // Converts null to int?
myNullablePoint = null; // Converts null to Point?
myNullableDow = null; // Converts null to DayOfWeek?
.NET allows implicit conversion from T to T? – myNullableInt = 10; // int to int?
myNullablePoint = new Point(10, 20); // Point to Point?
myNullableDow = DayOfWeek.Friday; // DayOfWeek to DayOfWeek?
Using Nullable types:
Nullable types provide the following properties: HasValue property and Value property – Point? myNullablePoint;
...
if (myNullablePoint.HasValue) // also OK: if (myNullablePoint != null)
{
Point p = myNullablePoint.Value;
Console.WriteLine("X coordinate: " + p.X);
Console.WriteLine("Y coordinate: " + p.Y);
}
else
{
Console.WriteLine("No value at the moment");
}
If you liked this post, please comment with your suggestions to help others.
If you would like to see more content like this in the future, please fill-in our quick survey.
Manage cookie consent
You can view this website without consenting to extra cookies. However you will need to accept the 'marketing' cookies to send messages via the contact forms & see any maps displayed on the site
Functional
Always active
Cookies necessary for the website to work.
Preferences
The technical storage or access is necessary for the legitimate purpose of storing preferences that are not requested by the subscriber or user.
Statistics
The technical storage or access that is used exclusively for statistical purposes.Cookies used to track user interaction on the site, which helps us to evaluate & improve the website.
Marketing: Forms & additional content (Marketing)
We need your permission to place ‘marketing’ cookies, so you are able to use the contact forms & see embedded content e.g. videos and maps. - - - - We have added protection to our contact forms to help prove that a human (rather than a spambot) is filling


If you would like to see more content like this in the future, please fill-in our quick survey.