In this tutorial you will learn more core C# and look at file systems and Serialization. This will allow you to write a simple C# program that you will then compile. The program will be a Visual Studio Form application
About this Tutorial
Objectives
Delegates will learn to develop applications using C# 4.5. After completing this course, delegates will be able to:
Use Visual Studio 2012 effectively
Create commercial C# Web Applications
Develop multi-threaded applications, Use WCF and LINQ
Audience
This course has been designed primarily for programmers new to the .Net development platform. Delegates experience solely in Windows application development or earlier versions of C# will also find the content beneficial.
Prerequisites
No previous experience in C# programming is required. But any experience you do have in programming will help. Also no experience in Visual Studio is required. But again any experience you do have with programming development environments will be a valuable.
Experience using a contemporary OO language such as C++ or C# would be useful but is not required.
Overview
In this tutorial we are going to be looking at file handling and serialization in C#. file handling is using files to store data that we are using in programs; when the program is closed all objects will be lost. However using files we are able to store these objects so as to re-use them in our programs. Serialization is the process of taking an object turning it into a stream of bytes in order to store the object or transmit it to memory, a database, or a file. Its main purpose is to save the state of an object in order to be able to re-use the object at a later date. The reverse process is called deserialization; Serialization allows the developer to save the state of an object and recreate it as needed.
Estimated Time – 1 Hour
Not what you are looking? Try the next tutorial – Additional C# Language Features
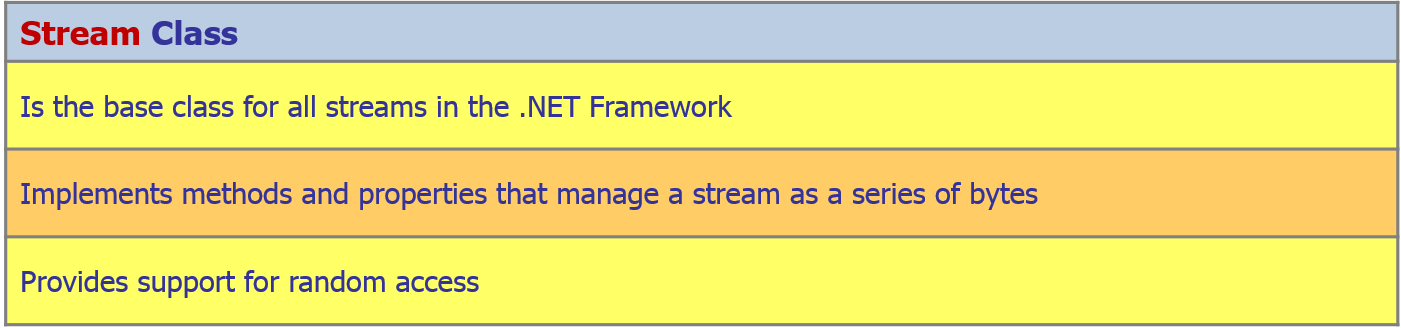
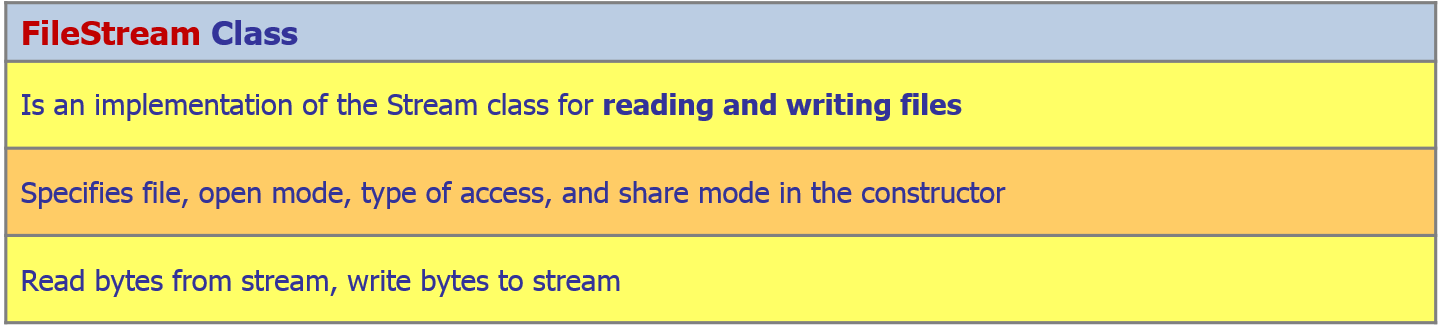
A flow of data from a source to a destination via a single channel.
Data arrives in the order in which it is sent.
Useful members:
CanRead, Read(), ReadByte().
CanWrite, Write(), WriteByte().
CanSeek, Seek().
Length, Position.
Flush(), Close().
Reading/Writing a File Using FileStream:
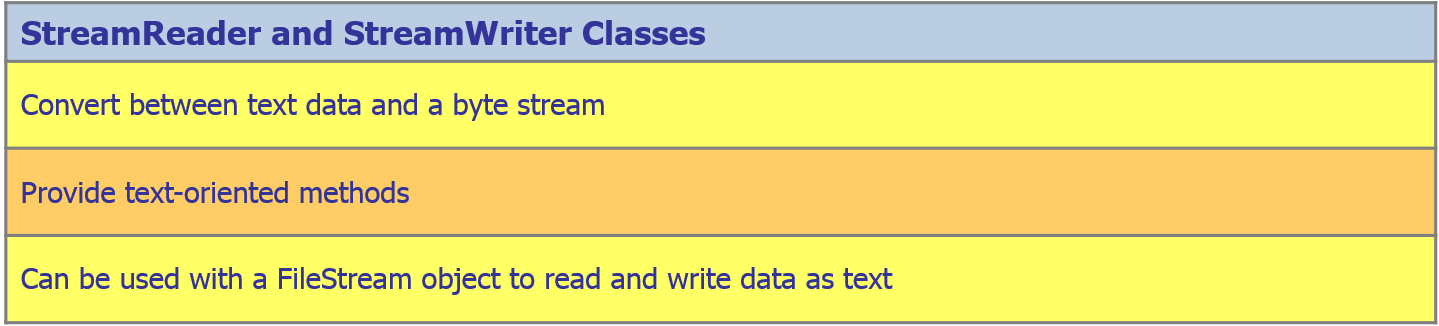
Reading/Writing String Data:
Useful members:
Peek().
Read(), ReadLine(), ReadToEnd().
Write(), WriteLine().
Flush().
Reading/Writing Text Data:
Useful members:
Peek().
Read(), ReadLine().
Write(), WriteLine().
Flush().
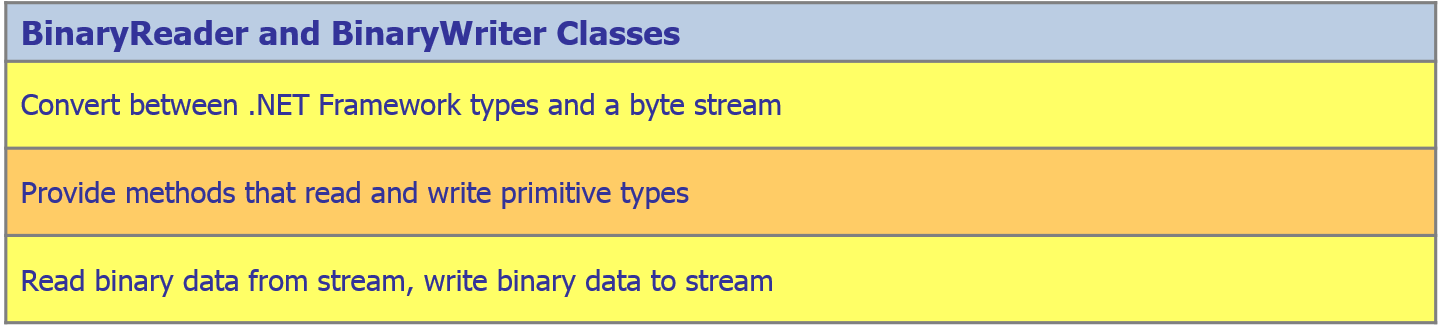
Reading/Writing Binary Data:
Useful members:
ReadChar(), WriteChar().
ReadInt32(), WriteInt32().
ReadDouble(), WriteDouble().
…
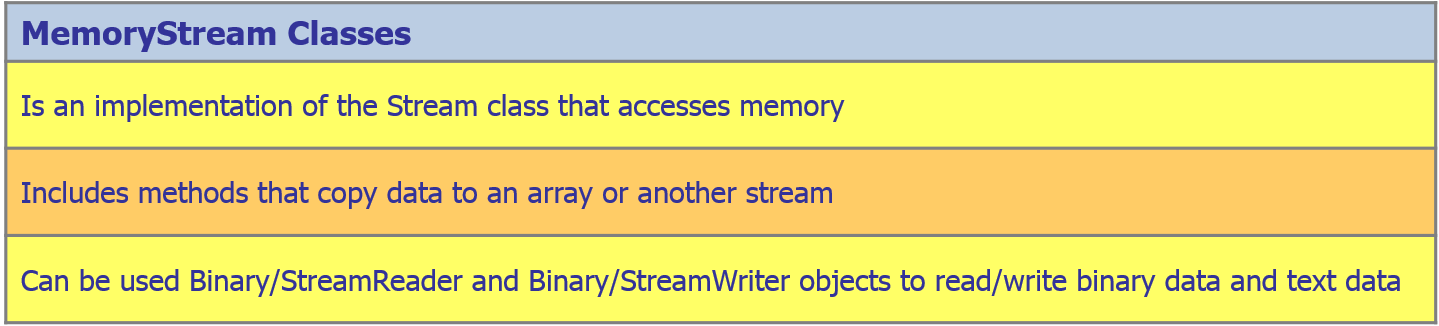
Reading/Writing Data in Memory:
Useful members:
ToArray().
WriteTo().
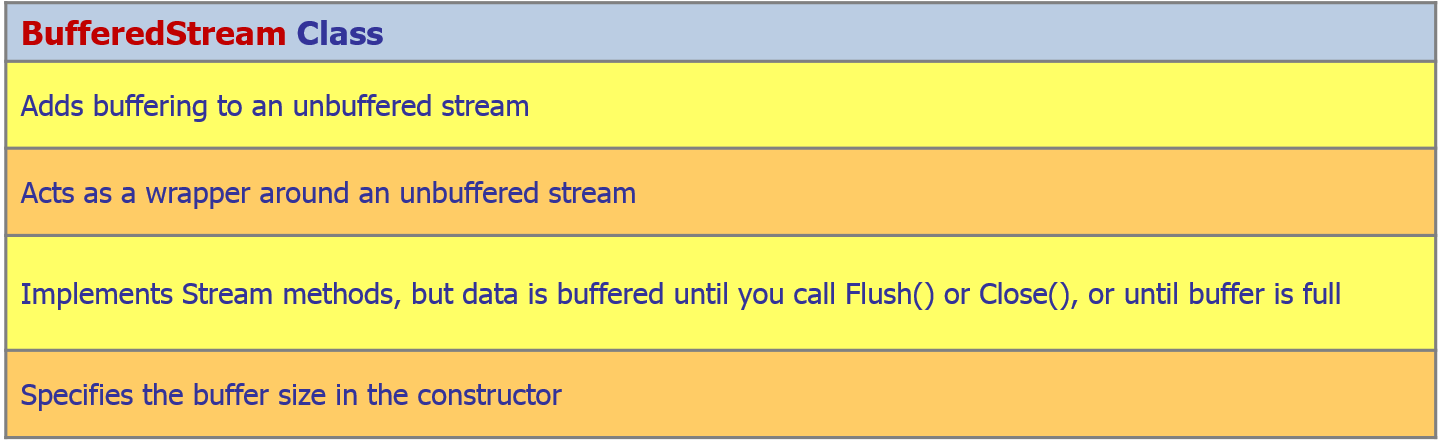
Buffering:
Useful members:
Flush().
Close().
Lab
We are now going to create a BankSystem that uses what we have learnt from lab one and lab two to hold accounts but hold these on a file so they will not be lost when the application finishes.
To do this I have included in the solution that can be downloaded at the top of the page a BankSystemInitial solution which means you wont need to create the unnecessary parts that have been covered in previous tutorials.
Open up the initial solution and there will be 4 classes. To start we are going to change Bank.cs and make it so that when the system starts it loads the bank accounts from their files and will also be able to save them back to their files.
In Bank.cs in the SaveAccounts()method add the following code which is going to save any accounts out of the dictionary to the source folder using their unique AccountID as the file name; if it already exists it will ask the user if it can overwrite this file and will then write the bank account to the file – public void SaveAccounts()
{
// Loop through all dictionary entries, and write each one to a separate file.
foreach (KeyValuePair entry in accounts)
{
// Get pathname, in format "C:\CSharpdev\Temp\.txt".
string filepath = string.Format(@"{0}\{1}.txt", storageFolder, entry.Key);
// If the file already exists, ask user whether to overwrite or skip.
if (File.Exists(filepath))
{
...
}
Now write the code to the files using a stream-writer, this will call the relevant method that is inside our account class and will send the StreamWriter as the parameter – // Write this BankAccount to file.
BankAccount account = entry.Value;
StreamWriter fs = null;
try
{
fs = new StreamWriter(filepath);
account.WriteToStream(fs);
...
catch (IOException)
...
finally
...
}
}
Next we will add the code so as to load information from files that already exist in the source folder and enter these into our dictionary to allow us to use these in our code as the bank accounts – public void LoadAccounts()
{
// Get all the files in the C:\CSharpdev\Temp folder.
foreach (string filepath in Directory.EnumerateFiles(storageFolder, "*.txt"))
{
...
string filename = filepath.Substring(numberStartPos, dotPos - numberStartPos);
StreamReader fs = null;
try
{
fs = new StreamReader(filepath);
accounts[int.Parse(filename)] = new BankAccount(fs);
...
catch (IOException)
...
finally
...
}
}
Now we have are files we need to create our methods that were used above to load/save the information from/to the files. The methods were being supplied with either a writer or reader and hence we have two methods one to read the data and one to write the data. To start we will do the file reader that will read each line as they were saved as you will see below – // Constructor to initialize a BankAccount from a stream.
public BankAccount(StreamReader reader)
{
// Read account holder from file, as a single line.
accountHolder = reader.ReadLine();
// Read balance from file, as a single line, and convert to a double.
balance = double.Parse(reader.ReadLine());
// Read transactions from file, and split at spaces.
string allTxStr = reader.ReadLine();
...
}
To save the bank account information we will do it as we were reading it above in the same order so to start we will write the name and then the balance and then after that the transactions – // Method to write a BankAccount to a stream.
public void WriteToStream(StreamWriter writer)
{
// Write account holder to file, as a single line.
writer.WriteLine("{0}", accountHolder);
// Write balance to file, as a single line.
writer.WriteLine("{0}", balance);
// Write transactions to file (space-separated), as a single line.
foreach (double transaction in transactions)
...
}
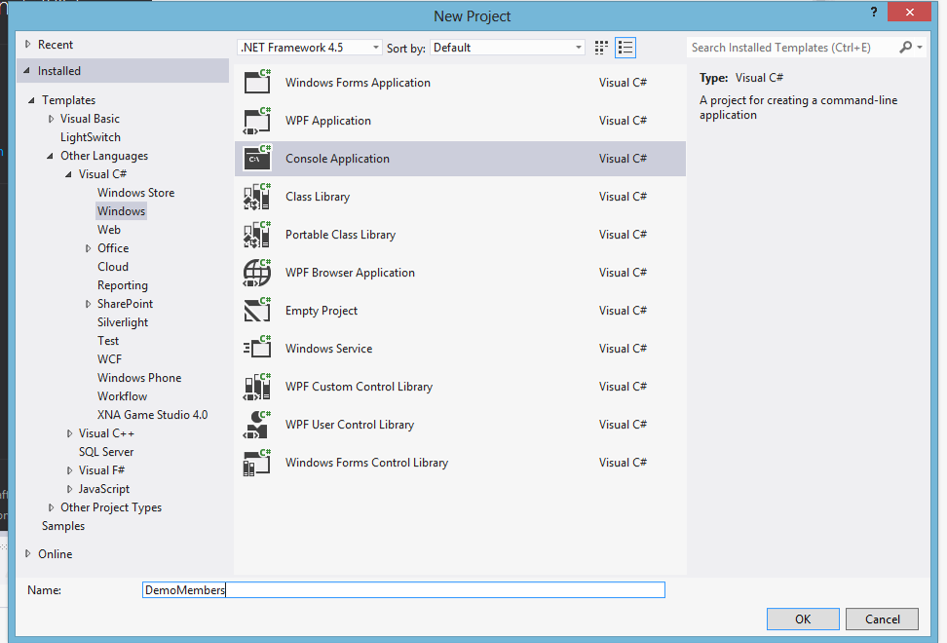
The final step is to test our application so we need to create some dummy accounts add some money to the accounts save them and then try and open these accounts using a different bank object form their files. First create the dummy accounts and save them to their files (all inside Main() in program.cs) – // Create a Bank object, add some accounts, do some operations, and then save the accounts.
Bank theBank = new Bank();
theBank[123] = new BankAccount("John");
...
BankAccount acc1 = theBank[123];
acc1.Deposit(100);
acc1.Deposit(300);
acc1.Withdraw(200);
...
theBank.SaveAccounts();
Next add the “different” bank and try to open the files – // Create a different Bank object, load in the accounts, and verify they've been loaded in correctly.
Bank anotherBank = new Bank();
anotherBank.LoadAccounts();
if (anotherBank.ContainsAccountID(123))
{
Console.WriteLine("Account 123: {0}", anotherBank[123]);
}
if (anotherBank.ContainsAccountID(456))
...
Console.ReadLine();
Now run the application and see what results you get, Yours will be slightly different to mine to start as I am asked to overwrite the files as they have been made already –
Lab 3: Data Contract Serialization
Lab 3: Data Contract Serialization
Overview
WCF = Windows Communication Foundation – Microsoft’s unified API for creating service-oriented applications.
WCF allows you to implement a Web service class and host it in a server application – a Web Server such as IIS.
Client applications can invoke the service – E.g. over HTTP.
Data can pass back and fore between the client and server – Simple types, e.g. integers, strings, etc. or Complex types, e.g. objects, collections, etc.
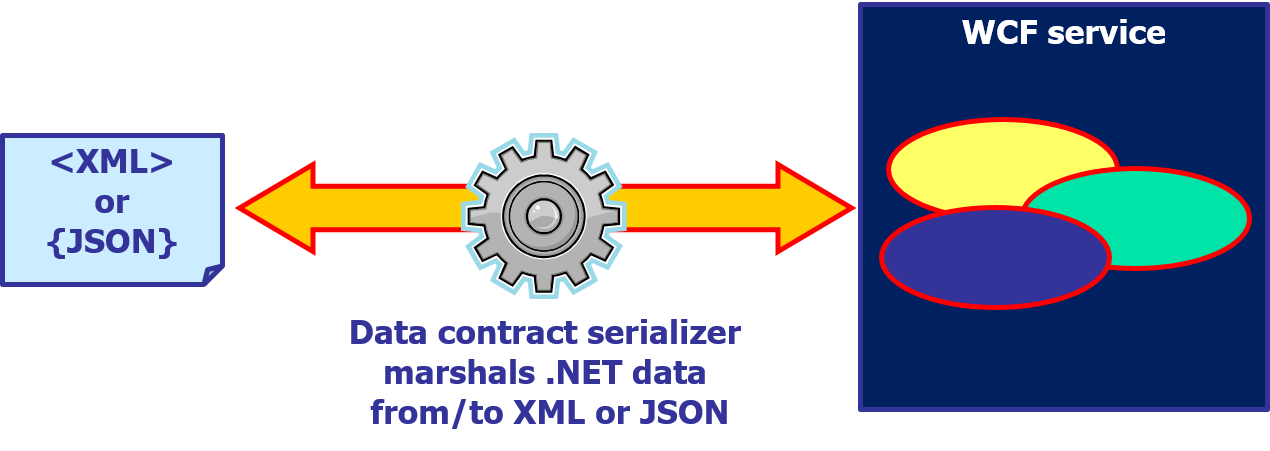
Overview of Data Contract Serialization:
WCF uses a data contract serializer implicitly to marshal .NET data into an on-the-wire format
E.g. XML for SOAP Web services
E.g. JSON for RESTful Web services
You can also use data contract serializers manually, to serialize/serialize data in a normal application
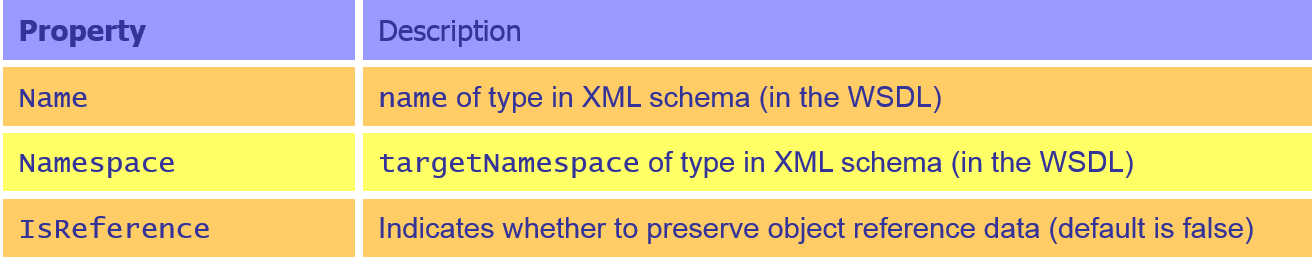
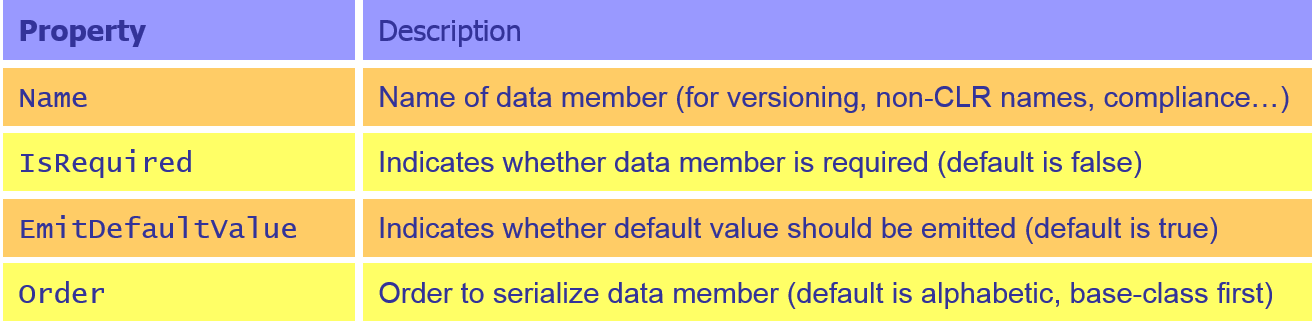
Defining a Data Contract:
If you want a .NET type to support data contract serialization:
Annotate your type with [DataContract], and annotate the data members you want to serialize with [DataMember].
Or just annotate your type with [Serializable].
Note: To use the data contract serialization APIs in your application:
Reference to the System.Runtime.Serialization assembly.
If you liked this post, please comment with your suggestions to help others.
If you would like to see more content like this in the future, please fill-in our quick survey.
Manage cookie consent
You can view this website without consenting to extra cookies. However you will need to accept the 'marketing' cookies to send messages via the contact forms & see any maps displayed on the site
Functional
Always active
Cookies necessary for the website to work.
Preferences
The technical storage or access is necessary for the legitimate purpose of storing preferences that are not requested by the subscriber or user.
Statistics
The technical storage or access that is used exclusively for statistical purposes.Cookies used to track user interaction on the site, which helps us to evaluate & improve the website.
Marketing: Forms & additional content (Marketing)
We need your permission to place ‘marketing’ cookies, so you are able to use the contact forms & see embedded content e.g. videos and maps. - - - - We have added protection to our contact forms to help prove that a human (rather than a spambot) is filling


If you would like to see more content like this in the future, please fill-in our quick survey.